Assumed skill level :
It is assumed that the pilot masters the basic techniques of launching,
flying towards the landing zone, making an approach and landing.
Purpose / Legal note :
Gathered since 1989, this list of tips is intended for the
paraglider pilot who wishes to improve his flying skill and better deal
with bad situations.
Some advice is trivial but can remain unknown to pilots
that did not grasp it the first time around.
The author does not encourage extreme maneuvers.
The author is not responsible for injuries or damage resulting from the
advice given in this document.
This document can not be reproduced, in part or as a whole,
without the authorization from Jérôme Daoust (
E-mail
).
Level of importance / Revision date / Color :
Each tip in this document is rated as :
About the author :
Jérôme Daoust (
E-mail,
see
My Photo Album
) has been paragliding since 1989.
He learned in Canada, and flew mainly at Mt Yamaska near Montréal.
He moved to France in 1993 and flew in the Alps.
Living in California since 1996, Jérôme currently enjoys flying
most often at Marshall
(see External Links/Flying Site).
You can learn to fly with him.
1 kg = 2.205 lb (pound-mass)
1 m = 3.28 ft
1 m/s = 197 fpm (feet per minute) = 2.24 mph = 3.6 km/h = 1.94 kt (knot)
1 km/h = 0.621 mph (miles per hour) = 0.278 m/s = 54.7 fpm = 0.540 kt
1 mph = 1.609 km/h = 0.447 m/s = 0.869 kt
1 kt = 1.151 mph = 1.852 km/h = 0.515 m/s
L1 - 1999/5/26. Group Effect. Seeing many pilots accomplish something may create a strong temptation to try to do the same thing. They may be more skilled than you, or they may simply be taking a higher risk. This is one time where you have to keep your ego under control, and judge for yourself of the skill and risk involved.
L2 - 2005/4/19. Living in the Moment. When flying, you live for the moment. This is good as a mental release from the rest of your life. But this is bad for the same reason, as you ignore risk consequences. Putting a family picture in sight can help.
L3 - 1992/9/1. Maybe your strong ego got you into paragliding. This is also why many people quit. They realize at one point that they are taking too many risks (to show off) and then feel that they are not really under their own control. It is then a good decision for them to stop. If you think I am talking about you, I am probably not, but maybe this helped.
L3 - 2000/8/4. Fame. What is the maximum reward that paragliding pilots can achieve ? Even if you get to be world champion or the one that went highest/furthest, most people don't even know what paragliding is. A few years after your death, the few people who remember you, will not do so because of your paragliding expertise, they will be your close friends and family. Maybe the greatest benefit of performance is self-esteem (if you don't have it already). Clint Eastwood (movie star) said : You're a legend in your own mind !
L3 - 2005/4/19. Risk-taking Creates Anxiety. You are on launch and everything seems good (weather, physical) but you have a vague unpleasant emotion. Think back on your recent flights. Do you remember taking higher risk than usual? When taking higher risk than normal, your mind will pass it on as anxiety later, to remind you of your loss of self-control.
L3 - 2006/12/11. Fear Control. An accident (or incident) you lived or have witnessed, has left you with fears, which overwhelm your flying pleasure. Knowing that:
L4 - 1999/2/20. Note to self : Paragliding never promised me good flying conditions on a regular basis. Just as any passion, paragliding will make me very upset at times. When a friend tells me that I missed a great day, I will hurt to the point of thinking : "I will quit this unpredictable hobby". The key is to look back at the year that went by, and ask myself if I am ready to lose what paragliding has brought me, and the joys waiting ahead, maybe next weekend.
L4 - 1999/3/20. Keep other hobbies. After the first years, unless paragliding is your business, flying every day may nullify most of the fun, or put you in search of peer recognition for your invested efforts.
L4 - 1999/4/6. Boldness Bell curve. A pilot's degree of boldness follows a Bell curve over the first five years. Pilots start conservatively, due to a low experience level and a high fear level. Midway, the experience level goes up, the fear level goes down, and bolder decisions are made. Boldness generally peaks when a pilot gets his advanced rating. This is the "Intermediate Syndrome". Towards the end, having experienced that bad situations happen to everyone, decisions become more conservative again.
L1 - 2003/12/17. Getting into the harness. Many accidents have happened because pilots are struggling to get into their harness after take off. The worst are those with their brakes in their hands and grabbing the bottom of their harness. The pilot will unintentionally enter a Stall (Full, Recovery), or if they use only one hand to adjust the seat, the glider will go into a Spin (Recovery). See Image: Repositioning harness with brakes in hand. Another bad idea is to let go of the brakes to then grab the harness, a Collapse (Asymmetric, Recovery) then takes too much take to control (you need to find your brakes again) and they come right back into the hill. A not-so-good idea is to hold both brakes with one hand while using the other to work on the harness, as you can't control a Collapse (Asymmetric, Recovery) as well as if you have a brake in each hand. It is not recommended to press on the accelerator bar to get better seated right after launch. If you are not automatically in your harness after launch, wait until you are safely away form the mountain, then use the following method. Lean back and lift your knees up towards your chest while pushing (but don't hold) with your hands (still holding the brakes) on all your risers at the height that you had your hands for braking, and squirm in the seat, to help "falling" into it. Practicing this maneuver in your garage by attaching your harness to a couple of straps will also help. Do you have harness lower back straps that are too tight ? A common problem is to have the leg straps too loose which places the harness higher as you run/launch, making it more difficult to get seated after.
L2 - 1990/7/1. Attitude. You don't have to take off. If you don't feel at ease with the flying conditions or with a new launch area, fly another day or at a better place. Beware of the Group Effect and those that fly to show off. I heard many times "Well I'm taking off !", and then you see him parked in the strong wind, sure looks like fun.
L2 - 1990/6/1. If the wind varies by more than 10 km/h (6 mph) in less than 3 seconds, you will encounter turbulent air. Don't launch.
L2 - 1991/7/1. The following applied to a rounded summit launch. As a general guideline, one can still launch if the average wind speed is 20 km/h (12 mph) with gusts up to 25 km/h (15 mph) not lasting more than 5 seconds, and still have a reasonable margin of safety with respect to the wing's air speed. One must measure the wind a far ahead as he can on the launch to avoid turbulence. Incline the wind meter to find the maximum wind speed direction. Remember that wind is reduced as it gets closer to the ground. Remember that there is more lift (better) and less horizontal wind speed if you can move forward from the launch.
L2 - 2000/9/7. Those gray clouds are darkening. Thermals and wide lift zones will become strong. Don't launch, and land if you are already flying. Looking around you may see rain showers (at a distance). See also : Flying in Rain, Landing near/in Rain.
L2 - 1990/5/1. Before pulling on your risers to inflate the wing, tell yourself : "This is a trial and will launch only if all goes well.". Don't think : "I have missed this launch twice, and people will not laugh of me any longer.". Fierce mosquitoes are also a bad reason to rush a launch.
L2 - 1990/8/1. After launch, your wing dives to gather speed (you haven't run fast enough) and starts to do a follow-up surge. If you increase the brakes while the surge starts, you will amplify the pendulum motion, which may then lead to a Stall (Full, Recovery) at the summit of the surge. This effect is compounded if entering a thermal (or lift) at the same time.
L2 - 1998/11/1. Top 10 bad reasons for launching : 10) I've waited long enough. 9) I can't get a ride down. 8) I'm hungry, cold. 7) It was a long walk up here. 6) It is getting dark. 5) Let's do it before the rain gets here. 4) The mosquitoes are eating me alive. 3) I will be late for diner. 2) I will look like a wimp if I don't ( Group Effect). 1) This is my last vacation day !
L2 - 2006/4/26. Pulled up during rotation from a reverse inflation. If there is a risk of being pulled off the ground as soon as the wing gets overhead from a reverse inflation, we may think it is a good idea to turn around quickly before that happens. See Image: Pulled up during rotation from a reverse inflation. But if your feet leave the ground during that fast rotation, then you can't cancel your rotational impulsion and you will twist the risers the other way, which is disorienting. It happened to me, and I kept pulling the wrong brake until my wing started facing the hill. To prevent this from happening in the first place, do not turn around quickly and/or request launch assistance (too proud ?). Most important, is to relax, and fly the wing away from the hill, untwist later. Grab risers as you rotate back, try to maintain their separation while facing the front (this may pass some rotation to the wing). Verify (before launching) that your Chest Strap Adjustment is not too narrow. For those with gymnastic talent, extend arms to side and extend your legs to the front (increases rotational inertia, reduces rotation speed) when your risers have maximum torquing force against the rotation, and twist your torso to prolong this ideal riser twist angle.
L2 - 2003/12/23. Wing Examination at Launch. Before commiting to launch, examine your wing overhead for Twisted Risers (Harness Flipped), a Line-Over (Recovery), a Cravate (Recovery), or a Knot (Unstable, Recovery) which is hard to see from underneath your wing. These situations could be irreversible once in flight. If there is enough wind, stay stationary and examine your wing overhead for a few seconds. See Video: Pilot launches with a knot, 2003/12/18, Salève.
L3 - 1989/9/1. The wing is over your head but slanted to one side towards the ground. Just "hitting" the brake on the side which is highest will send that side back down if you don't supply a strong forward motion. The most important action to fix this, is to move your body to the side that is closest to the ground. The idea is to re-center your body under your wing.
L3 - 1990/5/1. Let at least another pilot launch before you to have a better idea of the flying conditions.
L3 - 1990/5/1. If taking off in no-wind conditions, identify the lowest obstacle path in front of your launch area.
L3 - 2003/6/6. Launch - Mountain - Thermal Timing. Often, thermal currents form at regular intervals of time. By studying the wind speed 20 minutes, you will be able to predict the next cycle and launch just before the wind increases again. One should also note the duration of the peak wind speed within a cycle.
L3 - 1991/6/1. If you feel a light head wind at launch but look back and see trees being shaken by a stronger wind, look at the cloud movement above you to try to get a confirmation that you are not actually in a rotor from a strong back wind.
L3 - 1991/7/1. At launch you have a strong head wind (20+ km/h, 12+ mph) and people down at the landing zone are reporting light winds (less than 5 km/h, 3 mph). This indicates that the average lift component throughout your flight (ignoring thermals) will not be very good, because most of the wind speed is not coming from a lower altitude. Expect to face a head wind without much lift.
L3 - 1999/12/5. Cliff Launch. You are about to do a cliff launch and there is a strong wind in front of launch that makes a rotor behind you. If you start from far back, beware the band of lift just ahead, that will resist your entry, lift you up and push you back into its rotor. Try to launch as far ahead as possible and then be ready to fly at maximum speed. If you intend to stop at the edge of the cliff, be aware that the non-horizontal wind direction will cause your wing to stabilize ahead of you, pulling you forward unless you add more braking. See Image: Cliff launch.
L3 - 2014/3/7. Cross-Wind Launch. The wind comes at an angle (more than 30 degrees) from your left or right. If you must launch straight because of the terrain (corridor cut amongst the trees, like a ski slope in the woods), the side which is most exposed to the wind may Collapse (Asymmetric, Recovery) just after launch. Before your inflation, move your body about 50 cm (19") to the downwind side, to help load early your upwind wing tip and delay line tension to the downwind wing tip. Try to turn into the wind as soon as possible. See Video: Asymmetric collapse following a cross-wind launch, 2000, Aspen, CO.
L3 - 2004/1/29. You Forgot to Fasten your Leg Straps. Several people have died this way, hanging helplessly by their armpits for a couple of agonizing minutes, then letting go. If it happens to you, remember the following sequence. Grasp the risers. With your weight on your arms, swing your legs through and up, to hook them around the risers and lines. Pull the seat back underneath your bum. Swing back to normal position and fasten your straps. You can reproduce a similar situation in your garage to practice the maneuver. See Image: Recovering from untied leg straps, Video: Pilot recovering from untied leg straps, 2003/11, Canada.
L3 - 1991/4/1. You forgot to tie your chest strap. A similar situation happened to me because of a bad automotive-type buckle that let go in flight. After the initial surprise, you can just force it back together. The tension to close it is about 25% of your weight, depending on the angle of your suspension cone at that place.
L3 - 2006/4/20. Dust Devil (Waiting to fly and connected to your wing). If you are buckled into your harness, tied to your wing, and you see a dust devil close by, dive on top of your wing to prevent it from becoming airborne. See Image: Holding wing down during a dust devil, Video: Dust devil picks up a wing and harness, 2003, Piedrahita, Spain, Video: Dust devil picks up 2 pilots, 1996, Poland. Do not spend unnecessary time connected to your wing, waiting to launch. See also : Dust Devil (On approach).
L3 - 1999/12/5. I'm Launching - Make people aware. Make people in front of you aware that you are attempting to launch. They will enjoy watching you miss/succeed and you will avoid having someone inflate his wing in your flight path, or cause turbulence. See Image: Make people aware that you are trying to launch.
L3 - 2000/3/10. Pre-Launch Reserve Check. The velcro which holds the handle in place may set and become more fixed due to car transport vibrations, making it harder to separate the Velcro when trying to throw your reserve. Prior to getting in the harness :
L3 - 2000/8/1. Urinate before Launch. An empty bladder is much less prone to rupture than a full bladder during a crash-landing.
L3 - 2004/5/5. Kiting Wing Unattached to Body. You may have seen someone kiting his wing by the risers, unattached to his body through the harness, just held by hands. There is no need for this. Many people have died after being pulled up and dropped. Fatality examples : Portugal in May 2004, Tirol in 1999, Slovenia in 1991.
L4 - 1999/4/19. To help untangle your lines, stretch them out, hold up the "A" lines and tug on the brake lines, one side at the time, they often untangle all the others. If your harness is unhooked and your risers are in a knot, start from the canopy and work back down the outside "A" lines.
L4 - 1989/10/28. If a gust, bad ground handling or bad landing gets your wing in a confused and tangled mess try doing this : Grab the leading edge from the center and work your way out to the tip hand over hand. Never grab the tip and start pulling it out of the mess because that will make the mess worse.
L4 - 1991/5/1. If the wind increases as if a thermal passes by, but you don't see any tree branches moving in front and below the launch, the thermal can be forming behind the launch and pulling air through where you stand. You should feel slightly colder air. This is not a good time to launch.
L4 - 1990/5/1. When laying out your wing in strong wind, one can set small stones on the folded over trailing edge to prevent the wind from lifting it, or build up a 30 cm (1 ft) wall with the leading edge by keeping a light traction on the A risers. That wall will reduce the wind speed over the wing.
L4 - 1994/7/1. You will need to launch on a very slanted grassy slope. Bring a few clothes line pins to attach your leading edge to the grass so it doesn't slip.
L4 - 1991/6/1. You have a piloting seat (popular in the early 1990s) on your harness, and are launching with a heavy backpack. This will increase the wing's angle of attack. Apply more pressure with your legs to compensate the weight offset.
L4 - 1998/7/1. Your wing seems to always inflate from the wing tips before the center and you already tried the "horseshoe" or "V" shape layout. Instead of pulling on your "A" risers, pull on all lines (wear gloves) from the "A" riser except the ones going closest to the wing tip. This will put traction first on the center of your wing.
L4 - 2000/9/7. You are about to launch but rain is starting. Do you really need to do that flight ? Know that the bigger the raindrops are, the stronger the lift there is in/under the clouds. So if there is only a fine mist, the lift/sink might not be so bad. But if your hear heavy raindrops on your wing, beware. See also : Flying in Rain, Landing near/in Rain.
L3 - 2003/6/6. Tow Early and Often. Get towed early in the morning, and often, until you get a good flight.
L3 - 2003/6/6. Release on Lift During Tow. If you get decent lift on tow above 150m (500') AGL, then disengage. On the way up is your best chance of finding a thermal, too many people stay on to the end of the tow. It is difficult to find something you flew through early on the tow, and even if you do find it, the altitude gained on tow outside of it will be mostly lost and you now re-enter that thermal later in its cycle.
L3 - 2003/6/6. Tow Timing. This is different from a Launch - Mountain - Thermal Timing. If you launch in a thermal (gust), you will be in sink by the time you have height to release. On tow, you want to get a thermal towards the end of the tow. But it is hard to guess when this will happen, so Tow Early and Often. On strong wind days, launch in a lull.
L2 - 2022/2/23. Wind Gradient at Landing. You have the bad habit of flying a minimum sink rate prior to flaring for your landing. You should know that there could be a wind gradient (proportional to the wind speed) close to the ground that may make you Stall (Full, Recovery) a few meters above the ground. Fly at a higher speed when you are on your final approach.
L2 - 1990/5/1. Crabbing. You have decided to go land but the wind isn't aligned with your flight path. You will need to do like the way a crab walks, and fly "at an angle" from your intended flight path. Let's consider a wind component from the left. If you keep your wing pointed towards the LZ at all times, your trajectory will describe a curve towards the right as the wind has pushed you to that side, ending up to the right of the LZ, facing the wind almost head on to reach it. You will have to compensate sooner or later for that side wind component. Depending on the strength of the wind side component, you need to have your wing pointing at an angle from the LZ to compensate throughout the remainder of your flight. Note that while "crabbing" you are not constantly turning. The shortest path isn't always obtained by facing the destination.
L3 - 2000/9/7. Landing near/in Rain. Rain is falling heavily on the horizon (10+ km, 6+ miles). Expect the winds to dramatically increase as you come in to land, coming from this shower of colder air that spread when hitting the ground. See also : Flying in Rain, Wing Degradation due to Humidity.
L3 - 2002/5/28. Landing in Wind Shadow. The wind is strong and you must land in an area hidden from the wind, like a large hole in the forest. You will need to compromise between 2 evils : Dealing with Turbulence and a Stall (Full, Recovery) due to a reduced air speed as you enter the hole. The most likely event is a Collapse (Asymmetric, Recovery) due to turbulence, which may turn your wing around and result into a high speed impact. It is recommended to fly with 20% braking and practice Active Flying as you approach such a landing zone. You can expect a mild-to-moderate forward surge from the wing as it re-adjusts its airspeed.
L3 - 1990/7/1. You are going to land in a field where the wind is strong. Remember that a line of trees or a house can induce turbulence up to a distance of 10 times their height.
L3 - 1999/10/3. If you must land on a slanted slope and there isn't enough head wind to reduce your ground glide ratio enough to land facing the wind, increase your wing's angle of flight against the wind (don't head into the wind as much) until you start losing relative altitude against the slope under you. Flare (just before touching down) by turning into the wind.
L3 - 1999/7/25. You have landed. Nothing can happen right ? Someone has already died from being dragged after landing through a field, knocked unconscious by collisions along the way and swept into a neighboring river. See Dragged by your wing.
L3 - 1991/7/1. The stronger the wind, the less you need to flare.
L3 - 1999/7/25. Dust Devil (On approach). Stay as far as possible from dust devils. If one is on the landing zone, land elsewhere. See also : Dust Devil (Waiting to fly and connected to your wing).
L3 - 2004/9/20. Landing Backwards. If caught going backward at the time of landing :
L3 - 2004/9/20. Wing Kill. To quickly disable your wing :
| Method | Efficiency | Description + Comments |
| One A riser + Opposite brake | 80% | Simultaneously pull down one A riser and the brake on the other side. The wing will twist and bend back. If you don't brake enough, the open side may turn and hit the ground on its leading edge (bad). |
| Both C risers | 65 % | Let go of the brakes and pull down the C risers. The wing will hinge span-wise along the C line attachement points. |
| Both B risers | 50 % | Let go of the brakes and pull down the B risers. The wing will hinge span-wise along the B line attachement points. The wing may stay off the ground at a 20° angle. |
| Both brakes | 20 % | Pull both brakes as you run downwind towards your wing. The wing may pull you faster than you can run. |
| Both A risers | 10 % | Keep the brakes in hand and pull down the A risers. The wing will collapse from the front, but then have a strong tendency to re-inflate as it goes back, which would destabilise your stance from the sudden spinnaker effect. Early and ample braking following the A riser pull, could maybe prevent this. This method is not recommended. |
L3 - 2007/4/20. Precision Landing. Use 1/4 to 1/2 brake on approach. Release some braking to improve glide, increase braking to no more than 3/4 to degrade. To degrade glide even more, do S-turns with gradual movements about 1/4 brake.
L4 - 1991/9/1. If you have been flying for over an hour, make sure you legs are not numb. Beware of those tight variometer straps.
L4 - 2007/4/20. Landing on Speedbar and Brakes. The following is a high-risk maneuver for landing in a small area (without final precision)... 1/4 to 1/2 brake, then simultaneously add braking and speed bar to degrade glide. Practice at high altitude to get the feeling. To flare, just release accelerator (this makes you loose the final precision). About the risk of using brakes while accelerated, see: Accelerator (Turbulence). For a safer and more precise technique: Precision Landing.
L2 - 2022/2/22. Avoid using Big Ears (Problems).
L3 - 1996/5/18. On your approach to a top landing, you realize you are too high. Don't over-brake and be close to Stall (Full, Recovery), as it may just happen. Just overshoot, get into the lift again, get altitude and retry. Beware of making your approach from the back as you may get into rotors. Try making your approach from the side instead and turn into the wind prior to flaring. Ask the locals about the best approach for the site.
L3 - 1999/1/15. To reduce your glide ratio and improve the landing. Approach from the side (let's say the wind comes from your right), weight shift as much as you can to the right and maintain your axis with the left brake. This degrades the glide (good). Just before touching down, let go of the left brake and the wing will face the wind.
L3 - 1999/3/21. What is harder than top landing ? Deciding not to do it. If there are strong thermals in the area, or turbulence, think about it twice. This is especially hard when you see others top land before you, beware of this Group Effect.
L3 - 1999/12/5. Top Landing - Make people aware. Make people aware that you are attempting to do a top landing. They will enjoy watching you miss/succeed and you will avoid having someone inflate his wing in your flight path, or cause turbulence. See Image: Make people aware that you are trying to top land.
L4 - 2004/6/2. Top Landing - Increase Body Drag. To reduce your glide ratio (good), adopt an upright (standing) position and spread arms and legs, which increases the drag from the pilot. See also Reduced Pilot Drag.
L4 - 2000/12/14. Flapping. Some pilots flap their wing to degrade its Lift/Drag performance in order to facilitate top landing (common in Taiwan). The technique consists of pulling your brakes in small consecutive bursts (1+ per second). If we are attempting to duplicate a bird's wing flap during landing, lets remember that unlike them, we can not move our leading edge up and down, backward and forward, increasing its relative path through the air. What really matters is not to Stall (Theory). The question boils down to the following : If by flapping, the flow which was starting to reverse is re-established more quickly when we let off the brakes, than the time that it takes to reverse it while pulling the brake, then flapping could be better than a steady state equivalent braking. But this remains unanswered. Remember that flapping will not prevent your wing from a Stall (Theory). Alternative methods : Perform S-turns or Big Ears (Execution). See also : Butterfly.
L4 - 2000/12/14. Butterfly. This technique consists of repeatedly deep braking for about 2 seconds and releasing. The wing ends up doing ample pitch motions. I don't recommend it. See also : Flapping.
L2 - 1991/6/1. Look, lean, turn. Turn your head to see if the space is clear before making the turn. Furthermore, turning the head naturally tends to perform a proper weight shift in the harness.
L2 - 1989/12/1. Recall of basic flight rules. Avoid by the right. The pilot with the mountainside to his right has priority. The pilot just under you has priority. If you enter a thermal with other pilots already in, turn the same way they do.
L2 - 2001/2/24. Abrupt Steering. Sharp changes in steering input will increase your sink rate, as will tight turns. Perform smooth maneuvers to get the best performance. Sharp changes will also make your banking angle oscillate. The following describes a common accident. Facing away from the ridge, the pilot thinks that if he starts his turn sharp enough, he has time to complete a full turn. Supplying a sharp steering input, he quickly obtains a high banking angle. But just as he is now starting to face the hill, the bank angle now oscillates back to almost zero, sending him straight for the ridge at that time. Thinking that he is not supplying enough turning input, he "stuffs" the inner brake inducing a Spin (Recovery) and falling into to hillside.
L2 - 2000/4/3. Brake Toggle on Wrist. Flying with your brake toggles around your wrists (you threaded your hand) is dangerous because if you need to grab/throw your Reserve (When) or reach for something far from your last brake line pulley, you will be inducing an unexpected reaction in the wing from the excessive brake pull. The brake toggle may not slip out of your hand when you need it to, especially if you are wearing gloves. I also believe it provides less feedback than holding the brake with the fingers.
L3 - 2001/10/4. Harness Recline Angle. Adjust your harness so you can recline. Reclining in our harness doesn't feel natural at first (as other things in aviation), but when you do it will enhance your flights. To demonstrate the difference between flying upright and flying reclined, try this exercise. Sit in your harness whether in flight or in a simulator and note the things that are within your line of sight. While sitting upright, with your eyes on the horizon, you can see :
L3 - 1990/5/1. During turns, lean your weight into the turn to load the harness on the side you are turning, otherwise you will be counteracting some of your steering input.
L3 - 2001/10/4. Wind speed and direction at cloudbase, can be observed by looking at the movement of the Cloud Shadow on the ground.
L4 - 1997/6/1. When flying a ridge, low and close to the hill, always be weight-shifting away from the hill, that way if you have a hill-side Collapse (Asymmetric, Recovery) you will be less likely to turn into the hill as you are ready to correct before a problem develops. Note that too much weight-shifting away from the hill will require extra hill-side braking that is detrimental to the wing's performance. Determine your own safety/performance compromise.
L4 - 1991/7/1. The clouds indicate the wind gradient (speed and direction change with altitude). The head of the cloud gives an indication of the wind at its level while its base is more influenced by the winds closer to the ground.
L4 - 1991/8/1. To better understand another pilot while flying, turn your head such that you have one ear heading in the direction of the wind, thus reducing the whistling noise in you ears.
L4 - 1990/6/1. For those with a piloting seat (common in the early 1990s) on the harness, adjust your speed with the harness to reduce the braking effort and improve performance.
L4 - 2004/5/5. In-Flight Drinking. Sipping is actually a metabolic drinking method, where if you take in small amounts of water at a time, your body is able to metabolize it without causing much of it to end up in your bladder as if you guzzle it down. See also : In-Flight Urination.
L4 - 2007/4/20. Airspeed Reporting. Reporting an airspeed, like "my wing goes 40 km/h at trim" is meaningless without the corresponding altitude and your position in the wing's weight range. There are other factors (MSL air pressure and flight-level temperature) but you need to correct your measurement for at least these main factor:
| 2.2 km/h | 1000 m |
| 1.0 km/h | 450 m |
| 0.43 mph | 1000' |
| 1.0 mph | 2350' |
L1 - 2005/2/23. Entering a Strong Thermal. You feel yourself swinging forward under your wing and being pulled up. You must reduce you braking and give your wing speed during this phase. Some competitors even use their Accelerator (Usage). But do not increase the braking as you would risk a Stall (Full, Recovery). See Video: Adding brake during thermal entry, 2005, Valle de Bravo, Mexico. If you initiate a hard turn at this time, you risk a Spin (Recovery). Once installed in the thermal, and the wing stabilized overhead, reduce your speed but not more than minimum sink rate speed. More important than using your wing's best sink rate, you must concentrate on Centering the Thermal (using a Vario). When exiting a thermal, perform Active Flying, giving the wing less braking (or more accelerator) as you swing back under the wing after the forward surge, minimizing the time spent accelerating and in sink.
L2 - 2002/2/3.
Centering the Thermal (using a Vario).
If one follows the indications of his variometer : If
it indicates an increase in the climb rate, open up your turn (you may
even go straight).
If the rate of climb diminishes, tighten your turn as
we would otherwise be moving away from the center of the thermal.
There is no need to delay your response to your variometer,
since it typically indicates the average over the last second of readings.
This technique is good for wide thermal lift without a sharp increase
in climb rate near its center.
It can also serve to find better thermal cores when multiple thermals merge with altitude.
See also
Tighten on the Surge,
Feeling the Thermal.
L2 - 2002/12/2.
Tighten on the Surge.
When you feel the thermal pushing up solidly,
(or the vario indicates the strongest lift)
you should tighten the turn and dig the wing into the thermal.
Most pilots do not turn tightly enough.
When the vario indicates weaker lift or sink,
having kept a mental picture of the best lift location,
you should widen the turn and anticipate repeating the procedure at the next surge.
Do not exaggerate and induce a
Spin (Recovery)
when
Entering a Strong Thermal.
This technique is good for narrow thermals or ones with a sharp increase
in climb rate near its center.
See also
Centering the Thermal (using a Vario),
Feeling the Thermal.
L2 - 2002/2/3. Brake Control on Weak Lift Side. If a strong thermal lifts a side of your wing (your harness is lifted by one side), the other side will support less weight and may Collapse (Asymmetric, Recovery). You will feel the outside brake line going soft. At that point, pull on the soft brake line to increase that side's angle of attack and prevent the Collapse (Asymmetric, Recovery). Once normal brake line tension is restored, choose to fully re-enter or leave the strong thermal but don't remain in the vertical shear zone.
L2 - 2001/1/1. Don't Follow a Thermal Too Far Back. Because of the Thermal Path, when following a thermal over a mountain edge, it's normal to see ourselves go back into the mountain (while rising). But keep in mind that you will need to get back in front (usually) of the mountain after loosing the thermal. You will then mainly be fighting against a head wind. For this purpose, don't exceed a 45 degree (ground glide ratio of 1.0) angle when going up and back.
L2 - 1998/6/1. You are far from any ridge, and you have passed through some lift, which is gone now. You are wondering if you should be making a U-turn to your left or right to get back in it again. Go to the side that lifted your wing the most when you were in the lift. This will make you pass closer to the thermal's center.
L2 - 2002/2/3. Map the Thermal Using Others. You are turning the same thermal as someone else at the same altitude and your are both describing a large circle. You notice the other person suddenly sinking a lot. Reduce your turn radius or turn the other way to avoid the sinking area. By the time the other pilot returns to the thermal he will be below you. Similarly, if someone out-climbs you off to one side, move your circle towards them. There is no heroism in climbing slowly by yourself. See also Rake the Sky.
L2 - 2005/1/11. Finding a thermal from air disturbance.
L2 - 2008/8/12.
Thermal Model.
Definition of a thermal:
Rising air due to heating.
This definition helps to include the top part of a thermal that rises beyond
its buoyancy point thanks to its momentum,
and encapsulates anabatic wind within the
Thermal Collector.
In a
Thermal Collector,
the ground heated by the sun, generates a blob of heated air,
in which micro-thermals serve to give the blob
some thickness above the ground.
Consider the envelope of the blob as a fuzzy one,
not well defined.
A
Thermal Initial Impulse
will start the upwards spillage of the heated air within the
Thermal Collector
towards the
Thermal Launch Point,
after which it follows a
Thermal Path,
gradually emptying the heated air blob from the
Thermal Collector
faster than it was created,
creating a thermal life cycle.
See also :
Sink Origin,
Low Save.
L2 - 2008/8/12. Thermal Collector.
L2 - 2008/8/12. Thermal Launch Point. It is where the heated air from a Thermal Collector detaches from terrain.
L2 - 2008/8/12. Thermal Path. This is the path a thermal takes after its Thermal Launch Point. Factors influencing the path shape:
L2 - 2001/2/24.
Coordinated Turn.
A common problem is maintaining a consistent circle while thermalling.
An excessive roll motion may send you straight out of the thermal.
See
Abrupt Steering.
Try to maintain a coordinated, banked turn.
Start with a smooth controlled lean and a simultaneous and progressive
inside-brake application.
The wing will bank, your body will follow and the centrifugal force
will keep your body outside the wing's circle
to smoothly ride the thermal up.
Applying
Active Flying
to will help you keep the wing over your head,
which is a measure of a true coordinated turn.
Suggestion :
Use twice the amount of inside-brake tension than for the outside brake,
and adjust the turn with lean and outside brake.
L2 - 2008/8/12. Anabatic Wind. It is wind coming upslope, as part of thermal convection. It can be considered to be found within a Thermal Collector. The best anabatic lift is found 20-30 m away from the slope, and not closer, due to terrain airflow drag. See also : Catabatic Wind.
L3 - 1991/7/1. Thermalling close to a ridge. Making figure-8 turns can be better than full turns if there is a risk of colliding with the ridge.
L3 - 2002/2/3. Feeling the Thermal. From Robbie Whittall : When you feel a thermal lifting a side of your wing, brake that side, keep flying straight but if the sensation diminishes, turn more into the side that lifted to keep the same sensation. If this maneuver is executed correctly, you will end up describing a circle around the thermal. At that time you will know the thermal's diameter and center. Then tighten your circles. See also : Centering the Thermal (using a Vario), Tighten on the Surge.
L3 - 2005/3/3. Lost Thermal (Staying Local). If you have lost the thermal you were in. Make larger circles to find it again while looking at the other pilots flying below you, as you may still have time to use those thermals once you get in their axis. Active thermals for the pilots above you may be unusable at your altitude from now on. You can also try a "clover leaf" search pattern, allways re-centering on the best previous lift location. See also : Never Leave Lift, Finding a Lost Thermal with a GPS, Lost Thermal (During XC).
L3 - 2002/2/3. Weak Lift Optimization. So the thermal you were in has provided you with an altitude gain but has now mellowed, providing insufficient lift to maintain your altitude. You also know that thermal normally form there. Many pilots do not optimize the rate at which they go down, thinking that anything that doesn't make the variometer beep is equally bad. Concentrate in staying in the area that make you come down as slow as possible. Thermal activity follows a cycle that lasts about 15 minutes (or anywhere from 5 to 30 minutes) in between the time at which they provide maximum lift. By optimizing your rate of descent, you are improving your chances of waiting out for the next time the lift gets sufficiently strong again to go up. This is when you will see many pilots get "flushed" down to the landing zone as you start going up again.
L3 - 2008/8/12. Thermal Path Indicator. If you see tree branches moving somewhere down below, a thermal flow must be passing close by. Get over that area and find it (unless you are already if good lift). Another visual indicator of thermals is a group of rising bugs (butterflies...). In summer, you may see flower petals going up. If you suddenly smell something bad, it is usually coming from the ground, therefore in lift. See also : Thermal Model.
L3 - 2001/7/11. Calm Air and Now Sink. You were flying in calm air for a while and are now entering some sink. There may be some lift a little further, so don't turn around too quickly. There is usually lift somewhere close to that sink, try to find it. See also : Using Sink to Find a Thermal.
L3 - 2001/7/11. A Thermal is a Wind Obstacle. A strong thermal column constitutes an obstacle for the wind. If you are downwind from such a thermal, expect turbulence in addition to the sinking air. If you need to exit the thermal, choose an upwind direction. Note that the upwind exit rule does not apply when doing a Cross-Country flight. See also : Using Sink to Find a Thermal, Thermal Core Offset.
L3 - 2001/7/11. Thermal Core Offset. Wind will cause a thermal's maximum lift location to be shifted upwind. Think of a thermal's cross-section as being shaped like a water drop "falling" horizontally upwind. If entering the thermal from "behind" (downwind), keep heading upwind to find its true core (smoother, larger), don't stay in the disorganized lift in the wake of the thermal column. See also : A Thermal is a Wind Obstacle, Using Sink to Find a Thermal.
L3 - 2001/7/11. Using Sink to Find a Thermal. What follows applies to days where there is wind. If you encounter sink and turbulence, fly in an upwind direction to find the thermal. See why in : A Thermal is a Wind Obstacle. If you encounter smooth sink, the thermal should be downwind of you.
L3 - 2000/6/21. Lift Rate Estimation. How to estimate the thermal lift you will encounter based on the wind speed variation at launch. Assuming :
L3 - 2000/3/10. Staying in an Inclined Thermal. If your wing had a null sink rate, you could maintain a constant bank angle to follow the inclined thermal column on your way up. But with our wings that have a sink rate, you would fall under the lee side of the inclined column, so while turning you need to extend the period of time you head upwind in comparison to your downwind phase.
L3 - 2000/10/24. Finding a Lost Thermal with a GPS. If you are high and have lost your thermal you can find it again using the track log of your GPS. Zoom the map to about 200 m screen size, and you can see the wind-swept trace of your thermal circles. Fly over to about where you expect the next circle to be. See also : Lost Thermal (Staying Local).
L3 - 2000/8/9. Thermals under an inversion. You can expect more turbulence as the thermal reaches an inversion. See Image: Why an inversion create more thermal turbulence.
L3 - 2001/2/24. Do Not Change Turn Direction. This is especially true when low. There are 3 reasons :
L3 - 2001/2/24. Safe Inside the Thermal. The smoothest air is usually at the core of a strong thermal, and your wing will be more pressurized and stable when flying at a high bank angle. With a fast climb rate, you should expect turbulence at the edge of the thermal. Don't fly away from a very strong thermal as you are sure to hit turbulence. It is best to lock into the core and take it to cloudbase (or top of lift).
L3 - 2002/2/3. Best Approach to an Obvious Thermal. Approach from either directly upwind or downwind, as you may stumble onto a stronger climb rate than the established gaggle of circling pilots.
L3 - 2003/8/5. Punching Through the Inversion. Thermals who pass through an inversion layer have their diameter eroded away as they go through, with only the strongest core being able to traverse. You need to turn tighter during this period.
L3 - 2005/9/26.
Low Save.
When low, follow the horizontal tugs from the air
(see Finding a thermal from air disturbance)
unless it is unsafe to follow it.
Stay in the lift you have found,
making use of the abundance of low thermals,
as all the time you spend flying improves your chances of finding the thermal that will take you high.
Josh Cohn, on the abundance of low lift, 2005/9/16:
L3 - 2008/8/12. Thermal Initial Impulse. It is the mechanism that allows hot air gathered at a Thermal Collector to start moving in an organized manner. The sun heats the surface directly by radiation. The air is heated by conduction from the surface it is in contact with. So the air next to the surface is hotter than the air further from the surface. If the surface is completely flat, then there may be nothing to disturb the air into motion, and the layer of air next to the surface can get very much hotter than the air above it. It is the normal condition for the atmosphere in the morning. If the surface is completely flat, the heating can go on beyond the temperature normally initiating movement. However any tiny imperfection in the surface can cause a local increase in heating, and can initiate air movements. The impulse is something local that starts an updraft. Stirring, local heating, wind rising over a ridge. In the absence of such an impulse the cold air will sit over the warm air indefinitely. The strength of the impulse that is required depends on the instability in the atmosphere - lapse rate and heating. The word "trigger" is intentionally avoided because it is confused with both Thermal Initial Impulse and Thermal Launch Point. See also : Thermal Model, Thermal Restraint Breaker Myth
L3 - 2008/7/23. Sink Origin. Some mechanisms:
L3 - 2008/8/12. Catabatic Wind. Is is wind going downslope due to cooled air. The sink effect dissapears after 100 m distance from the slope. See also : Anabatic Wind.
L4 - 1991/7/1. When at cloud base, avoid the downward currents when they are materialized as filaments going down.
L4 - 2002/2/3. Cheap Thermal Simulator. Go to an empty parking lot and bring a buddy (let's call him Joe), a chalk, a blindfold, and a whistle. Go to the center of the parking and blindfold yourself. Joe will draw up the contour of a "thermal" with the chalk, about 40 ft (12 m) in diameter, and an X in the center. Ask Joe to bring you outside the "thermal" and point you somewhat towards it. Joe will blow the whistle when you are in the "thermal", with increasing volume as you are closer to the X (like a vario). Simulate brake positions with your hands. Start walking at a slow and constant pace. Try to circle around the X. Retry, but change your walking speed.
L4 - 2005/1/12. Thermal Rotation. The convergence pattern at the Thermal Launch Point will often induce a rotation, which has a 70% chance of following the Coriolis effect on a low pressure system (Counter-clockwise in Northern hemisphere). One can think of a Dust Devil (On approach). The rotation energy typically reduces with altitude, but can be sustained by unstable air (accelerating vertical flow). As you fly though it, you can feel a jolt of yaw, marking the center of lift for you. If the whole thermal section were to rotate about its vertical axis, it would make sense to turn against the rotation to reduce our angular velocity, reducing our bank angle and increasing our efficiency. But there is insufficient evidence based upon pilot experience to confirm that we can take advantage of this.
L4 - 2001/2/24. Thermal Quality. When catching a thermal close to the ground, it will be narrower and more violent. They tend to smooth out and expand as they rise. High-pressure days produce narrow and sharp-edged thermals. Days with a high lapse rate will produce thermals with a stronger ascent rate.
L4 - 2008/7/23. Thermal Sink Sleeve Myth. The myth : A thermal is a column of rising warm air surrounded along its length by a sleeve of descending cold air. Most pilots learned this during their schooling. This error in representation does not allow you to understand thermal breezes, and penalizes you while learning to perform thermal flights. Why people may believe in the myth :
L4 - 2008/7/23. Thermal Restraint Breaker Myth. There is no surface tension (not applicable between 2 gases) for a volume of heated air, holding it down to the ground. So forget ideas of spherical bubbles clinging to the ground by a "tendon", waiting for a moving animal or vehicule (or any assorted object) to cut it loose. Human soarable thermals range from several thousands to several million tons. Selective memory of pilots, based on coincidences, are keeping this myth alive. See also : Thermal Initial Impulse, Thermal Model.
L4 - 2008/8/12. Organized Convection.
L2 - 2004/12/5. Accelerator (Usage). You are using your accelerator (speed bar). Do you really need to ? Your wing is less stable under these conditions. Use of the accelerator near the ground, should be for emergencies only. Do not use the brakes at the same time for these reasons:
L2 - 1990/5/1. Try to fly in front of the side of the mountain which face is most perpendicular to the wind direction, such that there will be the least amount of sideways deviation of the wind (useless wind direction component).
L2 - 1990/4/15. Venturi Effect. A typical Venturi effect : On the mountainside that faces the wind, a dip in the profile will accelerate the wind over it. This typically happens in between to peaks. The horizontal component will increase, the lift will diminish. To cross this area, one should move forward (away) from it, and then get back closer to the mountain after having crossed. Think of it as an aspiration zone.
L2 - 2005/10/21. Blown Back. The wind has risen and you are now going backwards towards a ridge line. Face the wind. If there is no turbulence, use your Accelerator (Usage). Hope that the wind will reduce again, but look for potential landing zones behind you (beware of areas hidden from the wind). If you have managed to get back in front of the mountain, don't give the wind a second chance, go land. If the problem remains, you have options:
L2 - 1991/6/1. To reduce your altitude without sacrificing too much of your horizontal speed, use the Big Ears (Execution) technique or do some Wing-Over (Execution). Note that Big Ears (Execution) offers more stability.
L2 - 1991/6/1. If you fly very close to the mountainside (15 m / 50 ft or less) beware of turbulence induced by a lower irregular slope. Always have a light tension in the brake that would make you turn away from the mountain and keep some speed (above minimum sink) to be able to maneuver away.
L3 - 2001/1/26. How to Gauge Wind Speed from Visual Clues. See also : Water Surface - Gusts.
|
|
|
|
|
| Still Air. Smoke rises vertically. | Mirror-like water surface. |
|
|
|
Rising Smoke drifts. Weather vane still inactive. | Small ripples on surface. |
|
|
|
Leaves Rustle. You can feel the wind on your face. Weather vane is still inactive. | Small glassy wavelets. |
|
|
|
Leaves and Twigs move around. Light weight flags extend. |
Large wavelets. Some white caps. |
|
|
|
Thin branches move. Wind may raise dust and paper. |
Small waves. Frequent white caps. |
|
|
| Small trees sway. |
Moderate waves. Many white caps. Some spray possible. |
|
|
|
Large tree branches move. Exposed wire may whistle. |
Large waves. All white caps. Some spray. |
|
|
|
Large trees sway. Resistance felt when walking. |
Seas heap up the waves. Some foam streaks off waves. |
|
|
L3 - 1990/8/1. The depth of the usable lift band increases with the wind speed. In a light wind, you must remain close to the mountain to get sufficient lift. When the wind is stronger, you can move away from the mountain and still get enough lift.
L3 - 1991/5/15. At the end (shoulder) of the mountainside that faces the wind, the wind will slip sideways instead of going over and producing lift. Avoid these low lift areas.
L3 - 1990/6/1. You have been flying in lift caused by dynamic conditions, but your ground speed is not the same when flying along the mountain in one direction, compared to the other. This indicates that the wind has a sideways component. To now get over the landing zone with as much altitude as possible : Leave the lift when you have completed the leg that offered the least ground speed. That last effort of going back against the sideways component of the wind will now allow you to leave the mountain and have less to fight against the sideways component.
L3 - 1991/6/1. You have been soaring for a while but you now realize that you are making less and less turns and facing the wind in a more constant fashion. This indicates that the wind speed has increased while you were flying. Don't look at the others to see if they are still flying, decide on your own to go land.
L4 - 1991/7/1. The wind has been blowing 20+ km/h (12+ mph) all day, and the sun was out all afternoon. The wind will typically reduce its speed about 2 hours before sunset, and it is possible that the accumulated heat in the ground keeps giving off sufficient lift well in front of the mountainside. Welcome to "magic" conditions.
L3 - 1991/7/15. Unless the winds are strong all day, the following conditions will be typical during the day. In the morning you will have an offshore flow (from the land into the sea/ocean), about 3 hours after sunrise the wind will shift to on-shore (because the warmed-up land calls for the cool sea air), and return to offshore before sunset.
L3 - 1998/6/1. When the forecasted wind for the area is contrary to the on-shore or offshore flow, beware of wind shear a low altitude (When you are going to land). This typically happen if you go land in a valley at sea level.
L3 - 1991/7/15. You are going to land on the beach in a valley next to the mountain you launched from. It is early morning or close to sunset. Beware of an offshore flow as you loose altitude to go land. You may end up in the water. See also : Water Landing, Salt Water (Damage).
L3 - 2001/1/26. Water Surface - Gusts. While flying, look at the water surface to identify gusts of wind over its surface that may come in our direction. It will either look like a darker zone on the water or "white caps" if the wind gust is over 29 km/h (18 mph). You can see these zones coming in from quite a distance, allowing you fly more forward from the cliff and/or fly away from the path of the gust. But don't think that all gusts will be visible on the water, as some gusts can come from above. Visualize signs of increased wind on the water, as just the bottom of a three dimensional gust. See also : How to Gauge Wind Speed from Visual Clues.
L3 - 1998/6/1. At high tide, ocean water may cover most of the landing area on the beach. To avoid getting your glider wet or worst, getting dragged into the ocean, land facing the wind and as far away from the water as possible. While the glider drops, pull on one riser to let the glider stacks up on itself in a neat pile. You should have a hook knife to cut lines in case you get dragged into the ocean and tangled up. See also : Water Landing.
L2 - 1991/6/15. When flying over a large forest, identify emergency landing zones within your glide ratio.
L2 - 2002/2/3. Never Leave Lift. When you leave thermal lift before it has expired, you will encounter more sinking air around it. Just staying in mild lift may still lead you in the desired direction. There are exceptions. Leave lift if it brings you somewhere you don't want to go, like too far back into the mountains or into a cloud. Leave lift if you are certain of accomplishing you goal and you are racing. The lower you are (and risking to land) the less you should search for better lift. See also : Lost Thermal (Staying Local), Flying Height Band.
L2 - 2001/1/1. Don't Fly into Clouds. If the lift is very strong, take a bearing on your compass as an potention exit direction in case you loose visibility. When you loose visibility you may be flying back into a mountain, or another pilot. Without a compass it is impossible to know where you are heading as turning is hard to judge. Always maintain visual contact with the ground. If you are still in lift, take an evasive direction before you actually get to the base of the cloud, ending up ideally at the edge of the base with a safety margin. Before I knew better, I went into a white cloud for fun, but it then took me 20 minutes to find the exit and I had gained 2000 m (6500 ft) after many Collapse (Asymmetric, Recovery) to then find myself in between huge cloud columns. Another time, the sky "closed up" over me and I lifted in a dark cloud through rain, then snow, did a "B" Line Stall (Execution) and went back down to exit next to a mountain. Now, when I get close to cloudbase I watch out for an increasing climb rate, and consider a transition. See also : Escaping Cloud Suck.
L2 - 2004/5/11. Cloud Shape.
L3 - 2001/1/17. Cloud Snapshots while Climbing. With every circle as you climb in a thermal, look downwind to take a mental picture of all Cloud Shape in your predicted flight path. This will help you to determine which ones will still be forming as you reach them.
L3 - 1992/6/1. Consider going back and over the mountain you launched from only if you have at least twice its elevation (from the base). Ensure that you can clear it by as much distance as it takes you to do it (double your needed ground glide ratio) on the backside and avoid potential turbulence areas. Typical values : 1800 m (5900 ft) ASL at Marshall (California) to glide to Crestline, 600m (2000 ft) above launch at St-Hilaire du Touvet (France) to glide to "Dent de Crolles", 1000 m (3280 ft) ASL at Mount Yamaska (near Montreal/Canada) to fully clear the mountain.
L3 - 1999/4/12. If our flight axis follows that of the wind direction, ground speed is added and greatly increases the distance traveled. In this case, exit thermals on the downwind side and fly fast across the sink.
L3 - 2008/9/29. Speed for Best Glide. To get the best glide (most ground distance traveled) in no-wind condition, use your wing's best L/D (Lift/Drag) speed. If you must face the wind (or in sinking air), best glide ratio is achieved by flying faster than best L/D speed. If a tail wind pushes us into our flight direction (or in lifting air), slow down your wing, but not more than "best sink". With no wind, you need to be sinking at more than 3 m/s (600 fpm) before using your Accelerator (Usage) will give you a ground glide ratio advantage, but otherwise it just makes you feel good about doing something. See also : Flying Height Band, Speed to Fly.
L3 - 1994/5/1. If you are following a ridge that gives of sufficient lift all along your way, there is no point in following up a thermal, because there is no transition to accomplish.
L3 - 2001/1/1. Patience for Clouds. With cumulus clouds spread out throughout the sky, avoid flying in an area without any clouds because there is most likely fewer thermals there. This will typically happen over a lake (which does not produce thermals). If there are no clouds along the next 15 km (9+ miles) of your intended flight plan, get under a cloud and wait for the sky to improve.
L3 - 2008/9/29. Transition.
L3 - 2005/10/25. Accelerator to Dampen Pitch. Adrian Thomas, 2005/10/25: I've done comparative glide tests where one glider flew hands off with trimmers (available on some wings) released, and the other maintained the same speed using bar. It is very easy for the guy on bar to gain compared to other by actively damping pitch with bar movements. The gain is large. The movement sequence is: As the wing surges forward come off the bar, as your body begins to swing through go on the bar dynamically to dampen the motion and finish vertically below the wing. There are 2 advantages: significant performance and stability (collapse resistance) gain. You can stay on a higher average level of bar, in rougher air, getting better glide and fewer collapses. In even moderate turbulence I find I am going from 0 to 3/4 bar. If my legs were longer I'd be going to full bar. See also: Transition, Accelerator (Turbulence).
L3 - 2003/9/30. Testing the Air. Before starting you X-C journey, test a few thermals near launch for about an hour. This will avoid the frustration of a short flight if you sink out quickly. It will also help you determine the time between the cycles, the duration of the usable lift, max altitude, wind speed at higher altitude, Thermal Path, and the strength of the sink. See also : Flying Height Band.
L3 - 2002/2/3. Rake the Sky. When flying in groups, to get a better sampling of the lift as you are searching for it, fly along parallel paths, separated sideways by about 330 ft (100 m). Keep in contact visually or by radio.
L3 - 2005/3/3. Lost Thermal (During XC). Once you've lost the thermal that you've been climbing in, make only one more circle to try to find it, then start the next transition. Any more effort spent looking for the thermal is only altitude lost without going further. See also : Lost Thermal (Staying Local).
L3 - 2002/2/3. High or Low. Considering an altitude halfway between the ground and cloudbase (or the top of usable lift), anything above this altitude is "high", and under it is "low". If you are "low" you need to head for a Thermal Path. Stop for any solid lift when "low". See also : Flying Height Band.
L3 - 2005/9/26. Fly the Sky or the Ground. An often heard saying : When you are high, fly the sky, when you are low, fly the ground. See also : High or Low. "Fly the sky" means flying from one cloud (or Cloud Street) to another, based on Cloud Shape. If you are "low" focus on Thermal Launch Point and Thermal Path. See also : Low Save.
L3 - 2001/1/1. Recovery. Tell someone where you intend to go, in case you don't show up later. In many states (USA), a fishing licence will cover rescue costs. Because your radio signal goes further while still at altitude, report your potential landing zone before being too low. If both you and your recovey team have a GPS, you can report your position by coordinates.
L3 - 2008/7/23. Thermal Spacing. Generally, the more distance between thermals (or clouds), the longer they will last, because they are fed by a larger volume of air. Also, the higher top-of-lift (or cloudbase) will be. Typically, over flat terrain, the horizontal distance between thermals is 2.5 to 4 times their height above ground. The highest hill/mountain in an area, acting as Thermal Collector and Thermal Launch Point, will set a convection pattern over a zone with a radius of 10 times its height, shutting down thermals in its surroundings, with the exception of its flanks. See also : Organized Convection.
L3 - 2001/10/4. Cloud Shadow. The following applies to flat terrain. The advancing (outward-moving) edge of a cloud shadow often acts as a Thermal Launch Point. In dry climates, one can observe Dust Devil (On approach) at this advancing shadow edge. The theory is that it acts as a mini cold front lifting the warmer air. Be well ahead of the advancing shadow edge to maximize your chances of finding a Thermal Path. Avoid being over a recently shaded area, as it will require a full thermal cycle period to become a fully "charged" Thermal Collector.
L3 - 2008/9/29. Flying Height Band. Is is defined as the altitude range that you should fly in, starting at a safe low level, up to cloudbase or top of lift. At the beginning of the day, we should be patient and leave the thermal at the top. In the middle of the day when lift is strongest, we make our decision to leave the thermal when the rate of climb drops to 80% of the maximum, for a turn or two. This percentage would be modified up if :
L3 - 2003/9/30. Cloud Street Shadow. In the morning, when the Cloud Street to the East shadows the ground under you, try to avoid going down. Same thing at noon (shadow from your Cloud Street) and mid-afternoon (shadow from the cloud street to the West). In between, race between clouds with a good Cloud Shape. See also : Flying height band.
L3 - 2003/9/30. Thermal Street. Also known as "Cloud Street" if clouds form, or "Blue Street". Streets form when surface winds are over 13 km/h (8 mph) in greener areas. Deserts are not conductive to street formation due to high thermals and absence of a lift lid.
L4 - 2001/1/1. Fight Until the End. It is still possible to return back up to high altitude from 100 m ( 300 ft) from the ground. Never give up, but accept your faith early enough so you can still make a safe landing. There is only one thing better than getting high, and that is being low first.
L4 - 1992/6/1. You are ending you flight in a field with power lines ahead of you. You are wondering if you will pass those lines to make a little more distance. Just land before the lines, it won't really change your accomplishment.
L4 - 2002/2/3. Follow a Better Pilot. If you fly with someone who is typically slower than you, you will end up waiting for him. See also : Map the Thermal Using Others.
L4 - 2006/4/26. Microlift Lines. There can also be thermic convergence lines over flatlands, but the position can not be predicted. You have to find them by feel. When setting off on glide towards a distant target, keep the Chest Strap Adjustment wide to maximize sensitivity through the harness, focussing on the lift difference between the risers. For added sensitivity, you can hold the stabilizer lines or outside C or D lines. Avoid using brake for feel as it can degrade the glide. The aim is to weight-shift to turn towards the strongest lift and away from the sink. The path can become erratic, with significant deviations from the desired track. Flying along a good line is like balancing on a knife-edge. See also : Finding a thermal from air disturbance.
L4 - 2008/9/29. Speed to Fly. Depending on how easy it is to find the next thermal and its expected strength, one could fly faster than the Speed for Best Glide, to minimize the time to reach a goal.
L1 - 1998/11/1. Do you really need to let go of your brakes ? If you let go, and have a Collapse (Asymmetric, Recovery), the time it takes you to find them again is too long, and your wing may already have done half a turn, potentially leading into a Spiral Dive (Recovery). I know, it's happened to me. Never let go if there is a risk of turbulence and you are less than 200 m (650 ft) of the ground below you.
L1 - 2012/10/24. Collapse (Asymmetric, Recovery). Steer, then clear. Your wing has collapsed on the right side. See Image: Asymmetric Collapse - 60%, Image: Asymmetric Collapse - 75%, Video: Asymmetric collapse with counter, SIV clinic 1999, Salève, Video: Asymmetric collapse with no input, SIV clinic 1999, Salève, Video: Asymmetric collapse after launch followed by impact. Brake the left side enough to keep your direction if possible (unless you are flying into an obstacle) but not too much to Stall (Full, Recovery) the remaining open side, which would make things much worse, possibly putting you into a Spin (Recovery). Over-countersteering has been called the paraglider pilots's plague, keep the open side flying at the cost of letting the wing turn for a while. The fact that the inflated side is more highly loaded (and flying faster), contributes to a higher air pressure than normal inside the wing on that side that will the communicate internally to the closed side and help re-inflate it. On the collapsed right side, give very ample braking movements (small pumping is useless) until the wing fully re-inflates. For big (50+%) collapses, if keeping the direction is not important: Lean your body into the collapse, going with it, to re-inflate the wing faster and reduce the risk of Twisted Risers (Recovery). Note that on high-performance wings, if more than half your wing is collapsed, you may not be able to maintain your direction, but still brake the open side without making it Stall (Full, Recovery), this will prevent you from entering a Spiral Dive (Recovery). On intermediate (or safer) wings, the collapse recovers quicker without opposite braking (let it turn), but you need to judge if maintaining trajectory is more important. See also : Collapse (Asymmetric, Execution).
L2 - 1994/7/1. So you had an accident or a close call. Ask yourself if you could have done something to anticipate or resolve the situation. If there is nothing you could have done, you better stop paragliding. Was your ego the main factor for pushing yourself into bad flying conditions ?
L2 - 1996/6/1. The more turbulent the conditions are, the further away from the hillside you should be flying, to increase you altitude above the ground, in case a Collapse (Asymmetric, Recovery) occurs.
L2 - 2005/10/25. Accelerator (Turbulence). See also : Dealing with Turbulence, Accelerator (Usage). You have entered a zone of turbulence (the flight is bumpy). Get off the Accelerator (Usage) (unless speed is critical). Don't use the brakes (but keep hold of them)...
L2 - 2023/5/29. Dealing with Turbulence. See also : Accelerator (Turbulence). You have entered a zone of turbulence (the flight is bumpy). To react faster, look at your wing instead of just feeling it. Ball up your body to reduce the risk of Twisted Risers (Recovery). I don't recommend doing Big Ears (Execution), instead perform Active Flying. Brake use:
L2 - 2023/5/29. Active Flying. Collapse prevention :
L2 - 2023/5/29. 10% Braking Reduces Pitch Stability. With many/most wings adopting some reflex (trailing edge curving up) in their airfoil profile, 10% braking eliminates the reflex and reduces pitch stability, leading to more incidents in flight.
L2 - 1991/6/1. You have either exited a high-speed turn abruptly or entered a strong thermal (or dynamic lift). You are swinging forward under your wing and its angle of attack has increased. The overall pilot/wing assembly will surge up and at this movement's crest, you will feel yourself go light in the harness. The wing is sensitive to a Collapse (Asymmetric, Recovery) at this time. Expect your wing to follow with a dive (ahead of you). This is where you can add the proper input : Add progressive braking as the wing starts to dive and stop braking as soon as the wing has stopped going more forward. Do not keep braking when the wing is swinging back up over you as you will amplify the movement. In other words : Brake while the wing is moving forward, give speed while it moves backward to dampen the pendulum motion.
L2 - 2022/2/23. Big Ears (Execution). If you need to come down faster than your normal sink rate without significantly reducing your forward speed, use this technique. Depending on your wing, the size of the ears you make and how much Accelerator (Usage) is used, your sink rate will be about 2-4 m/s (400-800 fpm) and your horizontal speed may be slower or faster than without the ears: Increased wing loading trying to overcome the drag from the ears. For related problems, see Big Ears (Problems). Don't do this in anticipation of a rotor, instead gain as much height as possible (see Blown Back) and then Dealing with Turbulence. Now for the method:
L2 - 2004/12/5. Spiral Dive (Execution). The fastest descent rate can be achieved by performing this technique. See Video: Spiral dive from the movie "Fly Hard" and Video: Sébastien Bourquin makes a spiral dive, a wing-over, and a spin. Just start turning more and more until you feel your body centrifuged (you feel your feet swelling from the blood pressure) and your wing starts facing downward. I don't recommend pushing this until your wing is fully facing downward, leave a 30 degree angle to it. Read up on your wing's DHV test report (see Wing Certification) for this maneuver. You should notice that your variometer is indicating -12 m/s (2400 fpm) when executed properly. This is a very fast descent. Keep your eyes on your glider, the inside wingtip, otherwise looking at the ground or looking at the upper wingtip will result in nausea. If you see your field of vision narrowing and fear blackout (less blood pressure in your head), clench your stomach muscles (or bring your thighs up to your chest) to force blood back up to your head. To resume normal flight, reduce the amount of inside braking gradually to avoid a monster surge. See also : Spiral Dive (Recovery), Spiral Dive with 2 Ears (Execution), Escaping Cloud Suck.
L2 - 2012/10/24. Reserve (When). This indicates when you should use your reserve. If you have broken lines and your Wing is Out of Control, throw it. As general advice, if you are higher than 150 m (500 ft) from the ground below you and there is no broken lines, try to remedy the situation. If you have not fixed the problem when you reach that altitude, throw it. Even if you are on approach at 30 m (100 ft) from the ground, and you have an uncontrolled Collapse (Asymmetric, Recovery), throw it. See also : Reserve (How)
L2 - 2012/1/16. Reserve (How). See also : Reserve (When), Video: Classic reserve thrown, SIV clinic 1999, Salève, Video: Rogallo reserve thrown, SIV clinic 1999, Salève, Video: Wing Tangles with Reserve, Villeneuve, 1990. How to throw your reserve :
L2 - 1991/6/1. Fixed point method. Will you make over that crest , river, power line or to the landing zone ? Look at the scenery ahead of you as if it was a painting. As you are flying into it (look at it for at least 15 seconds) pick a point ahead of you like a house or a tree on the crest you hope to pass. If that point is moving down (in you imaginary painting) then you will fly over it. Repeat this process until you identify a point that is neither going up or down. That "fixed point" is where your glide you bring you. Try to average out any temporary sink of lift along the way.
L2 - 2001/4/17. Spin (Recovery). Do not confuse a Spin (Execution) with a Spiral Dive (Execution). See Video: Spin leading to twisted risers, SIV clinic 1999, Salève, Video: Spin - Forward Surge - Pilot Falls Beyond Wing, Villeneuve, 1991, Video: Spin - Forward Surge - Pilot Falls Short of Wing, Villeneuve, 1991, Video: Stall - Asymmetric Surge - Spiral, Villeneuve, 1992. To get out of a Spin (Execution) you must completely release both brakes. It is best to release the brakes when the wing is in front, to minimize the subsequent forward dive. When the glider recovers, it will dive forward and may need braking to stop it diving too much. Upon exit there is a risk of Deep/Parachutal Stall (Recovery). See also : Spin (Execution).
L2 - 1999/11/23. Parachute Landing Fall. PLF="Parachute Landing Fall". Anticipating a crash landing, this is the name of the position you adopt before you even get close to the ground. Legs together and pointing down, knees slightly bent, legs turned 45 degrees off the direction of motion. Present your calf to the ground first, then your thigh, then the hip, then tuck your torso in and roll, straightening your legs as you roll over on your back. Practice it by jumping off a chair.
L2 - 2014/12/19. Frontal Collapse (Recovery). This can happen when flying straight into a strong sink from a strong lift. Some can be prevented thanks to Active Flying. See also : Frontal Collapse (Execution). The wing's leading edge folds under, creates more drag, and the pilot swings forward from his momentum. A short duration brake impulse right after the collapse, accelerates the reopening and reduces the altitude loss, also preventing an asymmetric reopening and Cravate (Recovery). Caution: If the center of the wing has already opened and if the glider is just starting to pick up speed, be careful of applying brakes, as in this phase too much brake might lead to a Stall (Full, Recovery). Be ready to control the forward surge of the wing, but most often little or no braking will be required. Your wing may remain in a Shrimp Stall (Recovery) configuration, which you can fix. See Image: Frontal Collapse - Leading edge is folded, Image: Frontal Collapse - Center of wing flips under, Image: Frontal Collapse - All the wing flips under, Video: Small Frontal Collapse, SIV clinic 1999, Salève, Video: Frontal Collapse while under Big Ears, Video: Frontal Collapse with Shrimp, SIV clinic 1999, Salève.
L2 - 2004/5/11. Cloud Suck (Theory). When a cloud's width reaches a certain size, air rushing from the side will not satisfy its air draw, and cloud suck occurs. So a cloud's horizontal size is the dominant factor, not height. Conditions that promote this effect :
L2 - 2007/3/3. Escaping Cloud Suck. You are at cloud base and still going up at 2+ m/s (400+ fpm). Before you loose visibility, do Big Ears (Execution). This table shows typical descent rates of various maneuvers :
| Descent rate | Accessibility | |
| Small Ears (less than 15% each side) | 2.1 m/s (380 fpm) | ***** |
| Small Ears + Accelerator (Usage) | 3 m/s (540 fpm) | ***** |
| Big Ears (Execution) (at least 30% each side) | 3.1 m/s (560 fpm) | **** |
| Big Ears (Execution) + Accelerator (Usage) | 4 m/s (720 fpm) | **** |
| "B" Line Stall (Execution) | 8.5 m/s (1530 fpm) | **** |
| Spiral Dive with 1 Outside Ear (Execution) | 9 m/s (1620 fpm) | *** |
| Agressive Spiral Dive (Execution) | 15+ m/s (2700+ fpm) | * |
| Spiral Dive with 2 Ears (Execution) | 18 m/s (3240 fpm) | ** |
L2 - 2002/2/3. Locked Spiral Dive (Recovery). This is an extreme case of Spiral Dive (Recovery), not something that one normally wants. It is typically induced by an uncontrolled Collapse (Asymmetric, Recovery). It happened to me because I had let go of the brakes (mistake) while I was putting my Accelerator (Usage) bar back into its holder, and turbulence induced a half wing Collapse (Asymmetric, Recovery). By the time I found the brakes again, the still-open right side of the wing had induced a sharp left dive placing the wing horizontal with me, heading perfectly towards the ground, and fully re-opened. One may panic from the fact that this situation is self-maintaining and brake inputs seem ineffective. Because of the wing's high loading and speed, the amount of brake tension required, and response time, is much greater. Summary on how to recover :
L2 - 2012/10/24. Wing is Out of Control. Ball up your body, pull 30% brake, wait 5 seconds for a recognizable configuration. If this fails or ground is getting close, consider using your Reserve (When).
L2 - 2022/2/23. Big Ears (Problems). This is in fact a much more serious maneuver than people in general tend to think. For the technique, see Big Ears (Execution). In order of concern:
L3 - 2001/12/19. "B" Line Stall (Execution). A very fast descent rate can be achieved by pulling on the "B" risers. You may prefer this technique over a Spiral Dive (Execution) if you have to descend fast for a long period of time and spiraling makes you nauseous. I used it once to get out of a cloud that pulled me up about 200 m into drizzle and snow. You should first ask your Wing Manufacturer to know if your wing can be used in this manner. Also, behavior of the wing is specific to the brand and model, so consult your wing's manual. In any case you should know that it is detrimental to the wing as it highly stresses the anchor points of the B lines to the wing. Having said this, keeping your brakes in your hands, grab hold of both B risers under their link to the lines and pull symmetrically (with force) until they start coming down and tension is greatly reduced. You will feel dropping and stabilizing at about 8 m/s (1600 fpm). The wing can be steered by pulling more on one of the B risers, making a turn to that side. If you pull too much, it may produce a Shrimp Stall (Recovery). See Image: "B" line stall. To resume normal flight, most Wing Manufacturers recommend slow release of the B risers, but with a rapid release during the last 5-10 cm to ensure a rapid surge so that the wing gains flying speed on both sides and avoids a Deep/Parachutal Stall (Recovery) or Spin (Recovery). In general the surge from exiting a "B" Line Stall (Execution) is very minor and the greater problem is that some wings might hesitate or not exit into flight at all (see Deep/Parachutal Stall (Recovery) and Video: Bad "B" Line Stall exit, Hanglider Hill, Bakersfield, CA, 2000/2/18). Do not push on the A risers systematically after exit, as most pilots can tell if they are in a Deep/Parachutal Stall (Recovery) or not (worse would be to push the A risers during the wing's surge). Do not apply brakes until the wing has regained normal airspeed (normally after a few seconds) otherwise it is more prone to malfunctions. I used this technique maybe a dozen times (before I knew it wasn't good for the wing) and experienced a stable descent. Remember that this method also reduces forward air speed. See also : Escaping Cloud Suck.
L3 - 2001/2/9. Tree Landing. So you could not make it to you normal landing zone and you are over a forest. Don't aim for that narrow road in the forest with tall trees because your wing tips will catch the branches, Collapse (Asymmetric, Recovery) your wing and make you fall to the road. Also beware of power lines next to mountain roads. Instead, pick the biggest, softest looking tree, face the wind, cross you legs (to avoid cutting a vein) and close your arms, then flare to land right in the center of it, reducing your forward speed to zero. Keep braking until you can hold on to something. If this goes well you will end up suspended in the tree by your wing resting on the forest canopy, but you will not have a big fall to the ground. It will take time to untangle and maybe some repairs (at least an inspection), but you will have saved your bones from a fall. You can use your reserve as a "rope" to help you down. Look into your Emergency Kit. To get you wing out of the tree, detaching the lines from the risers can make it easier. Consider leaving the wing in the tree to return with climbing equipment and free the wing using boths hands while being secured to the tree. If the wing is caught in 2 trees, have a friend simultaneously free it from the other tree, just cutting down one tree could rip the wing. If your weight was partially or totally supended from your wing while in the tree, have the wing and lines inspected.
L3 - 2002/2/3. Spiral Dive (Recovery). Also called "Tight 360's". Do not confuse a Spiral Dive (Execution) with a Spin (Execution). If you induced the maneuver, and the Spiral Dive (Execution) is maintained by yourself still pulling the inner brake, progressively release that brake. See also : Locked Spiral Dive (Recovery).
L3 - 1990/6/1. Another pilot just passed close to you in the direction from which the wind is coming. If he is at the exact same altitude or above, there is no problem. If he is a little lower, you will feel the wake of his wing. The amplitude to the turbulence (wake) in the back of an aircraft increases with the load and how slow he is flying. The worst scenario is a tandem flying with lots of brake. This is one turbulence you can anticipate for.
L3 - 1990/6/1. Knot (Stable, Recovery). You have a knot in some of your lines (usually just after launch) but your wing remains stable. Maintain your direction by adding some brake to one side if necessary. Pull on the lines (if you can reach them) that lead to the knot, one at a time. If you can't undo the knot, go land. See also : Knot (Unstable, Recovery).
L3 - 2023/11/27.
Cravate (Recovery).
Description :
The wing tip has folded down, and is now caught in your lines.
This is different from a
Line-Over (Recovery).
It can have been caused by an
Unbalanced Roll Motion Collapse (Recovery)
or a
Shrimp Stall (Execution).
You have a cravate and the wing makes you turn out of your control,
maybe inducing a
Spiral Dive (Recovery).
See
Image: Cravate.
If you have a
Reserve (When),
use it now.
The following is if you don't have a
Reserve (When)
or choose not to use it (lots of altitude) :
L3 - 1999/5/26. Knot (Unstable, Recovery). You have knot in your lines, and the wing is unstable (repeated Collapse (Asymmetric, Recovery) or makes you turn out of your control). You have already tried pulling on the individual lines going to the knot and giving symmetrical brakes impulses. If you have a Reserve (When), use it now. The following is if you don't have a Reserve (When) or choose not to use it. If the knot is mainly tying up lines attached to the front risers and centered, induce a Frontal Collapse (Execution) by pushing the "A" risers apart (to the side). If the knot is mainly with rear lines, induce a Stall (Full, Execution). If the knot is not centered, induce a 50% Collapse (Asymmetric, Execution) by pulling the "A" riser on the side of the problem. Just make sure you have enough altitude to do such maneuvers. Hope that re-opening will clear it.
L3 - 1991/8/1. After a tight turn or Spiral Dive (Execution), if you raise abruptly the brake that was inducing the turn, there will be a big surge. While turning at a high bank angle you can exceed your wing's rated maximum speed due to the additional centrifugal force component that acts as an increased wing load. When returning abruptly to a straight flight path, your wing will try to slow you back down to the normal speed, sending you forward under it, and send the whole wing/pilot up because of the higher angle of attack and stored kinetic energy. Beware of a potential Stall (Full, Recovery) condition at the top of the surge.
L3 - 2002/7/12. Stall (Full, Recovery). You have achieved a stabilized stalled decent (brakes full on) by performing a Stall (Full, Execution). During the stabilized descent, the wing will repeatedly pitch forward as it attempts to fly again. Release the brakes when the wing has pitched to its most forward position, typically on the third time is surges. Rob McKenzie said (April 1999) : "Out of the dozen times I recovered from a full stall, every exit required different and immediate input, this is not something we can teach, especially over a radio". Enleau O'Connor (July 2002) : "Recoveries are cahotic". See also : Stall (Full, Appreciation), Active Flying.
L3 - 1999/10/3. Stall (Full, Appreciation). Many maneuvers clinics still promote a maneuver that involves for you to slow down the wing until you can recognize the onset of a Stall (Full, Execution) but not induce it, just recognize the warning signs. The problem with this, is that the Stall (Full, Execution) can happen abruptly, without warning signs, and then the pilot would release his braking to produce a forward surge, with the pilot possibly falling into his wing or passing next to it. See Video: Releasing brakes at stall onset. Exiting a Stall (Full, Recovery) at its initiation is more violent than after its stabilization.
L3 - 2012/10/24. Twisted Risers (Recovery). Your wing has spun around and left your risers twisted. See Video: Spin leading to twisted risers, SIV clinic 1999, Salève. This will also happen to pilots who reverse the wrong way during launch (only one twist turn). As risers start getting twisted, pull both brakes equally to about 40% to prevent asymmetric braking, before brake lines get locked and inducing a Spiral Dive (Recovery). Once twisted a few revolutions, your brakes become unusable, as lines are caught in the twisted risers. If you need directional control, you can try steering by reaching the brake lines (or D/C risers) above the twist. If the twist is not already coming undone by itself, grab the risers above the twist and un-twist yourself or run your legs at a side angle to induce a yaw rotation. See also : Spin (Recovery).
L3 - 2003/9/23. Wing-Over (Execution). Why do you need to do this ? Important things :
L3 - 2000/3/13. Deep/Parachutal Stall (Recovery). How to recognize the situation :
L3 - 2004/9/20. Dragged by your wing. If you get dragged on the ground by your wing in strong wind, grab only one riser (ideally a "B") and reel it in towards you until the wing becomes like a flag. To prevent being dragged in the first place, see Wing Kill.
L3 - 2000/11/27. Water Landing. This is not an exact science, don't listen to those who pretend it is. If there is current, without quick release buckles, a Tree Landing is preferable. If you want to jump out of your harness (before touching the water) :
L3 - 2006/8/18. Shrimp Stall (Recovery). Also called "horseshoe" or "rosette". See also : Shrimp Stall (Execution). A disadvantage of this method is that upon release of the center A lines (when voluntarily induced), the wing has a tendency to make a substantial surge which will require Active Flying. If this resulted from a Frontal Collapse (Recovery) (typically only happens from accelerated flight) and is stable, then symmetrical braking is used to restore the wing's shape. If the wing does not open symmetrically, the surge will be asymmetrical and put you in a bad situation.
L3 - 1999/12/5. Aerobatics at low altitude. It is a bad idea. See Image: Low altitude aerobatics is a bad idea.
L3 - 2000/2/18. Aerobatics over Another Pilot. It is a bad idea. See Video: Collision, 1999/1, Monte Carlo.
L3 - 2000/11/16. Unbalanced Roll Motion Collapse (Recovery). From Rob McKenzie. This dynamic situation in roll has one wing half lowering with one climbing. It can also be caused by exiting an updraft with one winghalf entering the downdraft at the edge or an unbalanced Wing-Over (Execution). The climbing wing (or the wing entering the downdraft) has as a result, a lower angle of attack. Often this can make the wing look as if it is hinged along it's chord. If it's very large in nature it can have the wing that is folding, make the wingtip move to a point almost in front of the pilot's face. As it gets to the low point it then blows rearward and if the lines are still arced outward the wing can blow back under the lines. A typical result is to get the C lines or D lines to become positioned up an over the top of the wing, going across the top toward the leading edge then down from the leading edge to the risers. A Cravate (Recovery) is the name of the result in most cases. See Video: Asymmetric Surge leading to an Asymmetric Collapse, Villeneuve, 1990.
L3 - 2000/8/3. Hypoxia. Hypoxia originates from the lowering air pressure, which lowers the partial pressure of oxygen, causing less oxygen to pass through the membrane of the lungs and therefore in the blood. Major factors which determine the altitude inducing Hypoxia :
L3 - 2005/4/19. Flying in Rain. You are caught flying in the rain. The following is dependent of the intensity of the rain and your exposure time. The fabric may stick together during recovery from a Collapse (Asymmetric, Recovery) or Frontal Collapse (Recovery). When flying in the rain your sink rate may increase because of disturbances to the laminar air flow over the wing. The soaking of the fabric (throught microcuts in the coating) increases the weight of the wing which causes the trailing edge to "drop", adding unwanted braking and increasing the angle of attack. This may lead to an irreversible Deep/Parachutal Stall (Recovery). Note that a wet wing will Stall (Full, Recovery) at a higher speed. So, do not make maneuvers that require strong braking like Wing-Over (Execution) or Spiral Dive (Execution), only do a "B" Line Stall (Execution) if absolutly necessary, and be light on the brakes during your landing approach. Do not do Big Ears (Problems). See Video: Flying in the rain, pumping ears out produces a deep stall, 2003. Make sure you maintain visibility for the rest of your flight. You may get cold. See also : Landing near/in Rain, Line Length Change, Wing Degradation due to Humidity.
L3 - 2004/3/31. Signs of Growing Overhead Cloud. Signs that the cloud you have glided under may be getting bigger :
L3 - 2004/9/3. Line-Over (Recovery). Description : Your wing has threaded through a line, but the tip is still inflated (usually), you can see a line travelling over the top of the wing. This is different from a Cravate (Recovery). It can have been caused by a Collapse (Asymmetric, Recovery), an Unbalanced Roll Motion Collapse (Recovery) or a bad Wing Examination at Launch. You have this and the wing is unstable (repeated Collapse (Asymmetric, Recovery)) or prevents you from maintaining your flight direction. If you have a Reserve (When), use it now. The following is if you don't have a Reserve (When) or choose not to use it (lots of altitude) :
L4 - 2006/12/18. Steering without the brakes. This is useful if you have a Knot (Stable, Recovery) including a brake line or if a brake handle has come undone from the line. Options in preference order:
L4 - 1990/6/1. Instead of looking at the place we are afraid to crash into (this is called fixation), look where you want to go to. Some pilots end up in a field's lonely tree for this reason.
L4 - 1991/7/1. You have made an emergency landing and you think you are hurt. Leave your wing unfolded as much as possible so people can find you easier and understand you are hurt. If you are well, fold up your wing.
L4 - 1998/12/1. Snow in the wing. If you have scooped up snow into your wing (due to ground handling), it is likely to build up in the trailing edge during flight. This in turn, will weigh down the trailing edge, acting as additional braking input (your brakes will feel soft). With enough snow (over 5 kg in a side of the wing) this can induce a Stall (Full, Recovery).
L4 - 1999/12/5. Shrimp Stall (Execution). Also called "horseshoe" or "rosette". I haven't found a usefulness for this technique yet, that other techniques ("B" Line Stall (Execution), Spiral Dive (Execution)) do not fulfill. It consists of pulling and holding the center A line and have the wing tips go forward. See Image: Shrimp stall. There was a period (roughly until 1992) when many wings only had two risers, making a "B" Line Stall (Execution) impossible, so this technique was taught as a fast decent method. One small advantage over a "B" Line Stall (Execution), is that it requires less arm strength. The disadvantages are associated to the Shrimp Stall (Recovery) and the risk of inducing a Cravate (Recovery).
L4 - 1999/4/24. Loss of altitude causing pain in ears. This result from a higher pressure outside the ear in comparison to inner ear pressure (inside your head). Use the Valsalva maneuver to equalize pressure : Close your mouth, pinch your nose and blow gently. Avoid blowing too hard and over-inflating the middle ear space. Note that differential ear pressure automatically equalizes during altitude gain.
L4 - 1999/12/2. Looping (Execution). Why do you need to do this ? Only attempt over a body of water (See also : Water Landing), with a recovery crew. Make a tight Spiral Dive (Execution) and exit it by a strong weight shift to send you into a full loop (very disorienting, strong acceleration load). See Image: Looping. A common mistake is to exit the Spiral Dive (Execution) by using a brake, this will reduce your kinetic energy, and potentially make you fall back into your wing from an incomplete loop.
L4 - 1999/5/26. Collapse (Asymmetric, Execution). Some reasons to perform this : Attempt to clear a Cravate (Recovery), increase the sink rate, practice recovery from a Collapse (Asymmetric, Recovery). To induce : Keep your brakes in hand, and pull down one or a few "A" lines leading to the wing tip. For a 50% collapse, you can pull down one "A" riser. To recover see Collapse (Asymmetric, Recovery).
L4 - 2014/12/19. Frontal Collapse (Execution). Some reasons to perform this : Attempt to clear a Knot (Unstable, Recovery) in central "A" lines, practice recovery from a Frontal Collapse (Recovery). To induce a small collapse, keep your brakes in hand, pull symmetrically down and inwards on A risers (will accelerate wing if done too slowly) until the leading edge folds under. The reason for also pulling inwards, is to help the tips also collapse (not just the center) reducing the chance of the wing getting into a Shrimp Stall (Recovery). For a bigger collapse, increase speed and amplitude of pull. This can also happen if you try to make Big Ears (Execution) too quickly. To recover see Frontal Collapse (Recovery).
L4 - 2000/3/10. Stall (Theory). Stall happens when you have enough reverse flow from the trailing edge over the top surface. Stalling depends on how much brake is pulled and for how long. You can be pulling less brake and still achieve stall if you wait long enough than a brake pull that produces a quick onset of stall. See also : Stall (Full, Execution), Flapping.
L4 - 2001/8/2. Stall (Full, Execution). Some reasons to perform this : Your wing is uncontrollable because of a Knot (Unstable, Recovery) and you don't have a Reserve (When) but have enough altitude, practice recovery from a Stall (Full, Recovery). To induce : Brake too much for too long. Do NOT release the brakes as the wing drops and pulls you backward, you would get a huge surge, possibly sending the wing below you. See Image: Forward surge followed by pilot getting wrapped in wing, Video: Forward surge followed by pilot getting wrapped in wing. Establish a stabilized descent (brakes full on). See Stall (Theory), Image: Maintained Full Stall, Video: Planned full stall, but released brakes to early, Zsofi 1999/1, Monte Carlo, Video: Stall - Asymmetric Surge - Spiral, Villeneuve, 1992, Video: Stall - Pilot Falls Into Wing, Villeneuve, 1993. To recover see Stall (Full, Recovery). If you had a beginner wing and now changed to a performance wing, review your normal braking position. I had a friend with a Trekking Corniche (1990 ?), which required lots of braking to get its best sink rate, change to an Advance Omega 2 (1991 ?). He stalled twice in flight, and injured his spine each time. See also : Stall (Full, Appreciation). Rob Whittall said (1995) for ALOFT magazine in response to "Do you advise that pilots learn full stall ?" : It's a mixed feeling. You could go both ways on that. It's good to know as much about your glider as possible, but also full stalls are dangerous, there are no two ways about it. I would probably say no. It's not worth doing full stalls because they can definitely get you in more trouble than they can get you out of. They're not going to get you out of any trouble because they're pretty useless forms of descent. And they're pretty messy. I think it is basically something best left to the test pilots, really. (End of quote).
L4 - 2001/2/3. Spin (Execution). Spins are pilot induced. A glider will only spin if the pilot pulls one brake so hard that he stalls that half of the wing. To induce a spin : Fly a low speed, then suddenly raise one brake and lower the other. This may result in Twisted Risers (Recovery). See Video: Sébastien Bourquin makes a spiral dive, a wing-over, and a spin, Video: Releasing brakes at spin onset, André Gallant 1999/9/4. The spin will continue as long as the pilot holds down the brake, and will recover when he completely releases the brake. See Video: Toni Bender doing a spin over Achensee (Nova test area) 2000/9/28. To recover, see Spin (Recovery).
L4 - 1999/9/2. Airplane on Collision Course. If an airplane is heading in your direction, do a high bank turn to show him you're there and head in the direction that gives the greatest chance of a miss. If you are close to a ridge, stay there.
L4 - 2000/1/17. Twisted Risers (Harness Flipped). Maybe because of a bad Wing Examination at Launch, you end up having both risers twisted in flight because your harness is rotated one full turn. This just happened to me (2000/1/15). Your wing is probably stable and stearable (although brake lines are rubbing on the risers). Go land (safest thing to do). The following is if you decide to untwist the risers in flight (only in stable air), and if you have either have a front or shoulder-mounted reserve deployment handle, since side-mounted handles have a 50% chance of getting caught by a riser while rotating (see Reserve Handle Position). Visualise which way to rotate (pitch axis) the harness to untwist the risers. Fly to a place where there you have sufficient ground clearance. Let the wing fly at trim speed for a few seconds, let go of the brakes, and hope for no Collapse (Asymmetric, Execution). If a backwards flip is required, push on the risers while sending your feet (leg extended) upward and over the top, and for a forward flip, first get your legs extended and close to vertical before starting your rotation. Stretch out your arms so they will encounter the risers and stop the rotation after one turn, then grab your brakes.
L4 - 2000/7/25. Airsickness. Remedies, by order of effectiveness :
L4 - 2004/5/5. In-Flight Urination. Options :
L4 - 2000/12/14. The Reverse Spiral. It is only an aerobatic figure, without any real utility. While in a Spiral Dive (Execution), a Spin (Execution) is induced and maintained. The centre of rotation is between the pilot and the wing, so the pilot ends up travelling backwards. Raoul and Félix Rodriguez of the SAT (Safety Acro Team) have created this maneuver. See Video: The Reverse Spiral performed by Raoul Rodriguez, France, St-Hilaire, 2000/9/23-24.
L4 - 2000/10/6. The Helicopter. It is only an aerobatic figure, without any real utility. A Spin (Execution) is induced such that the wing turns about its center and descends vertically. See Video: The Helicopter, Switzerland, Villeneuve, 2000/8/25-27.
L4 - 2003/5/5. Cough CPR Myth. The usefulness of the method knows as "Cough CPR" is an urban legend started in 1999. Its use is limited to clinical situations in which the patient has a cardiac monitor, the arrest is recognized before loss of consciousness, and the patient can cough forcefully.
L4 - 2006/8/18. Myth: Good Pilots Prevent 99% of Collapses.
L4 - 2007/3/7. Spiral Dive with 1 Outside Ear (Execution). A small/moderate outside ear is folded and held, then a Spiral Dive (Execution) is progressivly initiated. Do not let go of the ear before exiting the spiral dive and flying straight. Being able to use the inner brake makes the initiation and exit easier than a Spiral Dive with 2 Ears (Execution). The theory is that the drag caused by the ear diffuses the energy and makes the pilot feel less centrifuged. Note that the pilot's load is supported by a smaller portion of the wing and less lines. Dangers:
L4 - 2007/3/7. Spiral Dive with 2 Ears (Execution). Do Big Ears (Execution), then widen the Chest Strap Adjustment and lean in your harness to start a Spiral Dive (Execution). Patience, it takes a few seconds before it starts, but accelerates afterwards. Descent rates close to 20 m/s (3600 fpm) can be achieved, so be aware of your altitude over ground. During the maneuver, look towards the inside of the turn. A big advantage of this maneuver is that there is almost no G loading on the pilot because of the limited bank angle of the wing and low centrifugal effect, making this maneuver more accessible than an agressive Spiral Dive (Execution) alone. The maneuver can be done in a very turbulent air mass. To exit, release the ears, then dissipate the rotation energy by straightening up in your harness and doing 2-3 more turns. But this maneuver is hard on the lines and you loose brake input control. No problem with new equipment, but don't do this often. And if your lines are getting old, don't do this. See also : Spiral Dive with 1 Outside Ear (Execution), Escaping Cloud Suck.
L2 - 2000/9/7. Wing Degradation due to Humidity. If there is still moisture in your wing when you store it, mildew will set in and greatly accelerate the deterioration process of the material. This is one of the worst things you can do to your wing. Wings can get wet, but just make sure it is very dry when you store it away. Never do a flight to dry your wet wing (See also : Flying in Rain), leave it in the shade. Another bad thing is to store it in a compressed state (under a load, or rolled very tight).
L2 - 1991/6/1. Darn ! You have made a small tear in your wing. But you think that it is so small that it is not worth repairing. My Engineering background reminds me that even a small hole (as long as material is cut) will locally diminish the strength by a factor of 3. And at the tip of a tear it can be reduced by a factor of 10. You better use that special sticky tape (made for paragliders) they gave you with your wing to redistribute the efforts over that tear. If the tear is bigger than 5 cm (2 in) think of having it professionally repaired. Beware of using common sticky tape like electrician tape or duct tape which adhesive material will harm the material.
L2 - 2002/6/25. Wing Selection. Decide on the DHV (see Wing Certification) rating you want (see Wing Rating for You) and make a list of each Wing Manufacturer's latest wing that corresponds, considering the wing's worst DHV rating (Accelerator (Usage) in use or not) for your weight. If you want to keep your harness, eliminate wings without a DHV rating for your harness type (GX, GH). Stick with major Wing Manufacturers. Reduce your list to models that came out within the last year and a half, to have state-of-the-art technology. Your list should now have 5-6 wings. Disregard price as they are usually similar. Eliminate wings that have not been reviewed in a reputable magazine (like "Vol Libre" or "Parapente Mag"). From reviews, pick one that seems to have the best performance (see Wing Test), handling and ease of inflation. Don't put too much emphasis on a demo flight because even a competition wing can be well behaved in gentle conditions, and having a Collapse (Asymmetric, Recovery) doesn't suddenly make the wing a bad one (trust the DHV rating instead). Consider also Wing Loading. Some colors have more UV Resistance than others. Buy/order it from a reputable reseller, be confident in your choice, have fun flying it, but don't email the world in an attempt to convince others you have bought the best paraglider.
L2 - 2000/2/23. Wing Rating for You. See also : Wing Selection.
L2 - 2006/4/26. Chest Strap Adjustment. DHV tests wing with a 38/40/42 cm adjustement (between the centers of the riser bottom ends) depending on wing size. A recommendation can also be given in your wing's user manual. When you make it wider, these are the effects ordered by importance:
L2 - 2000/4/3. Brake Line Length Adjustment. The ideal brake line length is achieved when the brake lines are deflected by about 30cm (1 foot) at the center of their length, while your brakes are released and you have fully activated your Accelerator (Usage). Note that when accelerated, your trailing edge rises, so you should not adjust the brake line length while not in accelerated flight.
L2 - 2000/12/16. Leading Edge Hits the Ground. This can occur during landing or bad ground handling. Did you hear someone yell "whack" ? When the leading edge of your wing hits flat on the ground, pressure inside your wing may exceed its design limit and cause rips in cell walls or diagonal ribs. Have your wing inspected.
L2 - 2015/5/20. Reserve Connector to Harness Bridle. It should have a minimum strength of 9 times the total suspended weight. A typical connector: 7 mm wire diameter, square, Stainless Steel quick-link. To avoid loading it in a weak direction, use O-rings (maybe rubber bands, but not sticky tape) to secure bridles in place. See Image: Reserve connector to harness bridle / Quick-Link / Normal and Image: Reserve connector to harness bridle / Quick-Link / Square.
L3 - 1996/6/1. There is a consensus amongst paragliding professional that a wing is good for 300 hours of direct sunlight exposure. So if you want to keep your wing for a long time, protect while not in use. You can use a small tarp if you don't want to fold it up. At least bunch it up, and hide the top surface close to the leading edge (most important part for a wing's performance), by exposing the bottom side instead.
L3 - 2000/10/31. Line Length Change. Line lengths can increased differently for each pair of risers if you are caught Flying in Rain, changing the angle of attack of your wing. Getting your lines wet may cause a subsequent shrinkage (during drying) in their shielding (not the actual core) and that could set your wing out of trim exposing you to Deep/Parachutal Stall (Recovery) as the lines with a lower loading (C, D) may not extend back to their original length right away.
L3 - 2001/5/31. Wing Cleaning.
L3 - 2004/4/17. Keeping Lines in Place. If your lines are moving around on your riser's quick links, get some O-rings (see below for size) from a hardware store. Two methods :
L3 - 1999/3/23. Don't walk on your lines, especially on rocky ground. Fibers inside your lines may get broken while the line's protective layer hides the damage. In the same idea, don't pinch lines. Making a small tight knot reduces line strength.
L3 - 2001/10/4. Carry a spare Riser to Harness Connection, if/when you detach your harness at the end of the day, fasten the risers together with it. This stops the risers from going through themselves and tangling up.
L3 - 2002/3/28. Folding your Wing. Do not always fold the wing symmetrically to the center cell as this can cause constant stress on the center cell (center cell always to the outside). Protect the rigidification in the leading edge by superposing it during span-wise folding and making it part of the same fold during chord-wise folding. Do not press down too hard on you wing to evacuate the trapped air :
L3 - 2007/2/10. Riser to Harness Connection. You have a choice amongst these :
L3 - 2004/2/3. Wing Loading. For a higher wing loading :
L3 - 2005/7/31. Accelerator Line Connection. Do not use Brummel hooks which don't have a tight insertion fit or spring clips. When releasing from full acceleration, they can catch on one side of the harness and the asymmetrical acceleration can induce a Spiral Dive (Recovery) or a Collapse (Asymmetric, Recovery). The Woody Valley X-over harness seems most vulnerable. Solution : Wrap Brummel hooks with tape or use small quick links. Test that each connection can support your body weight (safety factor of 2+) without deformation. See also : Accelerator Adjustment, Compact Brummel Hook Knot.
L3 - 2005/7/31. Compact Brummel Hook Knot. If you have limited motion of your accelerator line because the Brummel hooks contact an grommet or pulley on your harness, avoid having a knot on the line below the Brummel hook. See also : Image: Brummel hook J knot, Accelerator Line Connection.
L4 - 2002/6/25. Ballast. If it is hard ballast (which could hurt someone below), keep it with you. Letting go of your extra ballast (water), will not give you a big sink rate advantage. See the laws below. For example, assuming your best sink rate is 1.1 m/s (217 ft/min), letting go of 10 lb (4.5 kg) when your total flying weight is 200 lb (91 kg) will only better your best sink rate to 1.072 m/s (211 ft/min). So concentrate on you technique instead. Letting go of your ballast will indicate your desperation to others. This is the basic law :
A ballasted pilot looses out in turns from both the direct increase in sink rate, and the increase in sink rate that results from the steeper bank angle that is required for a given turn radius. The total effect is roughly proportional to the change in weight. Only if you expect to be racing, spending 2/3 or more of your time gliding (not thermalling), then it might be good to be heavily loaded on your wing. This would be particularly true if you expect the thermals to be turbulent (when the extra agility and stability would help you core the thermal). Ballast can also allow you to fly a bigger glider that glides a little better, and which can fly a little slower and turn a little tighter in thermals. See also : Wing Loading.
L4 - 1999/11/16. UV Resistance.
|
UV resistance by material color. |
||
| Porcher (Advance, Airea, Firebird, Flying Planet, Gradient, ITV, MacPara, Pro Design, Windtech). Source : Cross-Country #51, page 39. | Carrington 1080 (Gin, Nova, XIX) and Carrington 1097 (FreeX, Swing, UP) Source : Cross-Country #49, page 51. | Gelvinor (Apco, Ozone) |
| Purple, Black, Blue, Light Orange (Gold), Lilac. | Red, Orange, Sun (Gold), Royal, Sea Blue, Purple. | Light Gray. |
| Yellow, Dark Blue, Orange (Mandarin), Red, Light Blue (Bluet). | White, Black. | White. |
| White. | Parma (Light Pink). | Green. |
| Light Blue (Azur), Turquoise, Green, Fluorescent Green, Fluorescent Yellow. | Pink XT (Magenta), BT Green, Fluorescent Orange. | Sky Blue. |
| Light Grey. | Rossignol. | Medium Blue. |
| Pink. | Fluorescent Pink. | Violet. |
| Fluorescent Orange, Fluorescent Pink. | Fluorescent Yellow. | Yellow. |
| Purple Blue. | ||
| Orange. | ||
| Turquoise. | ||
| Purple. | ||
| Pink. | ||
L4 - 1992/5/1. If you keep a very large plastic trash bag with you, well packed, it won't take up much space and it will help you keep your wing dry in case it rains.
L4 - 2006/8/14. Salt Water (Damage). If you have fallen into salted water, you must rinse all your gear in soft water. Many components would otherwise keep deterioration after the salt water is apparently gone because the salt crystals remain and they are harder than the Kevlar fiber in your lines that will wear out by abrasion. Rinsing your lines in soft water may be unsuccessful in removing all salt crystals, you may need to replace all your lines. Electronic equipment that has been submerged should be turned off as soon as possible, batteries removed, then rinsed in distillated water (Try not to wet parts that have not been flooded), let dry (convection without heat) completely before being reactivated. If you often fly over water bodies, put your electronic equipment in watertight bags.
L4 - 1991/6/1. You fly at a place with lots of mosquitoes and you cover yourself with repellant oil. Some of these products will eat away your wing's material. Be sure to wipe off your hands before handling your wing.
L4 - 1997/6/1. If you have a harness with a rigid Kevlar back protection, consider replacing it with a softer protection. Kevlar back plates were popular between 1992 and 1997, but medical tests revealed that they concentrate more load to the lower back upon a crash.
L4 - 2001/1/1. Emergency Kit. Item to put in your emergency kit :
L4 - 2001/8/31. Air Travel.
L4 - 1998/12/1. When the snap that holds your brake toggles to your risers won't unsnap easily you can put a little lip balm (chap stick) on the male end of the snap. Avoid Vaseline or any other petroleum-based product.
L4 - 1999/5/26. Costume. Make sure you can use the full travel of the brakes. If the costume has too much volume it can cause excessive drag and bring you close to Deep/Parachutal Stall (Recovery). If the wing must support the costume, use the "B" risers but keep the load light. Don't reduce visibility too much. Use a wing which is easy to inflate.
L4 - 1999/6/10. Skin protection from the Sun. UVA sunlight is absorbed by urocanic acid (natural molecule made by the outermost skin cells) chemically altering it, and causing it to create within the cells a type of oxygen free radical. This oxygen radical degrades collagen and elastin (major molecules that make up the skin), decreasing the elasticity (aging) of the skin. Also, malignant melanoma (deadliest form of skin cancer) is 90% caused by UVA, 10% from UVB. Melanoma risk depends a great deal on genetic factors such as hair, skin and eye color, and the number of moles you have. People with fair features were six times more likely to get melanoma. Most sunscreens protect against UVB while doing little to against UVA, giving a false sense of security. UVA can be blocked by a few sunscreens, including zinc oxide (white goo that lifeguards often smear on their noses). Check the label to make sure lotions contain ingredients (like Parsol) that also protect against UVA. Use a wide-brimmed hat, long pants and a long-sleeved shirt.
L4 - 2000/6/21. Reserve and Handle Position.
| Advantage | Disadvantage | |
| Top reserve with handle mounted on a shoulder strap. | Easy to find, can be grabbed by any hand. |
Handle may be unusable if you have
Twisted Risers (Recovery)
behind your head (it happened to me).
Note : Do not relocate a side-mounted handle to a shoulder position for which your reserve/harness has not been designed for (do not extend the handle to reserve strap). |
| Lower back reserve with handle mounted on side of harness. | Faster deployment than when handle mounted on a shoulder strap. |
Risk of interference if doing a rotation with the harness for
Twisted Risers (Harness Flipped).
Difficult to grab handle with opposite hand. |
| Front reserve with handle mounted on reserve. |
Reserve can be easily transferred to another harness.
Easy to find, can be grabbed by any hand. | Reserve can easily be left in the car. |
L4 - 2000/10/24. Harness Seat Board. Your harness has been designed for a given seat board width. If you reduce its width in order to fit tigher in your harness, the reserve parachute may be locked by the deformed harness shape when it is loaded. To achieve a tighter fit, use a foam padding inside the harness.
L4 - 2000/11/3.
Sunglasses.
Avoid polarized sunglasses.
They are good to reduce dominant horizontal polarization from a broad,
smooth horizontal surface directly ahead and slightly below the viewer's eye level
(good for driving or fishing),
but when flying, the terrain below is usually too irregular to produce
orientation-specific polarization.
Also, they may interfere with viewing liquid-crystal displays (LCD)
such as your variometer's.
Horizontal power lines will be more difficult to distinguish because
their reflection is absorbed.
About sunglasses in general...
If your eyes are good you can see better in all conditions without sunglasses.
For people with eye problems which require a tint,
yellow/orange lenses can help to spot the edges of clouds, inversions,
but can cause problems with distance perception.
Get the lightest tint you can stand.
Prescription non-tinted glasses already filter out most UV rays.
L4 - 2005/12/12. Unsheathed Lines. Typically found on competition wings. Compared to "normal" sheathed lines:
L4 - 2013/7/30. Knot - Brake Line. For tying your brake line to its toggle, see: Image: Bowline plus stop, Image: Non-slip loop knot.
L4 - 2003/1/2. Line Tab - Junction Method. Some wings have external tabs under the wing for connecting the lines, made of a folded strap sewn back into the wing. There is a good and a bad way for the end loop of the lines to connect to this tab : Image: Line tab - Junction method.
L4 - 2003/1/8. Brake Pulley Noise. Tired of hearing your brake pulleys squeak ? Do not use petroleum-based lubricants, they could find their way to your wing and damage it. Use a Silicone-based lubricant and wipe away any excess.
L4 - 2005/3/18. Reduced Pilot Drag. Reducing aerodynamic drag at the pilot level, by use of a profiled harness or other means, will improve you L/D at any airspeed, but more at higher airspeeds. For the same "no brake (trim)" situation, the L/D is mainly improved from a better sink rate (slightly raised angle of attack from reduced drag below the center of drag) while airspeed remains about the same (contrary to what many still think). See also Top Landing - Increase Body Drag, Unsheathed Lines.
L4 - 2004/6/24. Accelerator Adjustment.
L4 - 2005/3/14. Broken Line Sheathing. Order a replacement line, then consider these options:
L4 - 2025/11/14.
Sheathed Line - Sealed End.
If you had to cut a sheathed line, you can seal the end to prevent fraying:
L4 - 2006/2/11. Elastic Cord. Also known as: Bungee cord, shock cord. Many harnesses are starting to use 3mm (1/8") elastic lines so your speedbar auto-retracts. If you buy material commonly found in hardware stores, you will typically get a double-layer sheathing of Nylon, which is ideal for abrasion resistance, but elongation will be limited to about 100% (30 cm length becomes 60 cm). A better compromise is a Polypropylene single-layer sheathing, which provides 140% elongation (same as cord from Sup'Air). In the USA, one source is Superior Bungee, part # 125P1216SU25.
L4 - 2008/3/23. Extra Line Loop at the Riser Quick-Link - Length Effect. Where a lower line (1.5 mm diameter) meets the riser quick-link (3.5 mm wire diameter), if you add an extra loop for the quick-link wire to thread into, the line will effectively shorten by 9.5 mm.
L4 - 1998/1/1. There are no good pilots, only old pilots.
L4 - 1998/1/1. The only thing better than getting high, is being low first.
L4 - 1999/8/1. I am a talented, skillful and experienced pilot with excellent judgement. I use my experience and judgement to avoid getting into situations where I have to rely on my talent and skill.
L4 - 1999/12/22.
A popular analogy for describing the learning process
is to split it into four stages :
1) Unconscious ignorance (Beginner)
2) Conscious ignorance (Intermediate)
3) Conscious knowledge (Advanced)
4) Unconscious knowledge (Guru)
L4 - 2001/1/22. Leonardo Da Vinci : Why fly ? For once you have tested flight, you will walk the earth with your eyes turned skyward, for there you have been, and there you long to return.
L4 - 2001/1/22. Fr. Nietzsche : The higher we rise, the smaller we appear to those who do not know how to fly.
L4 - 2002/2/4. It's always better to be down here wishing you were up there, than to be up there wishing you were down here.
L4 - 2002/2/4. Everyone who lives, dies. Yet not everyone who dies, has lived. We take these risks not to escape life, but to prevent life from escaping us.
L4 - 2007/5/15. Every new pilot is issued two bags: One is full of luck. The other is empty. The goal is to fill the empty bag with experience before you run out of luck.
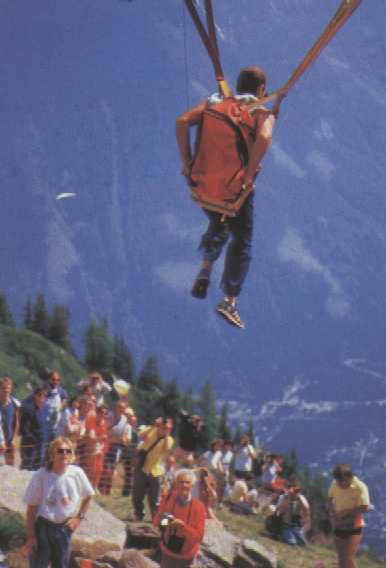
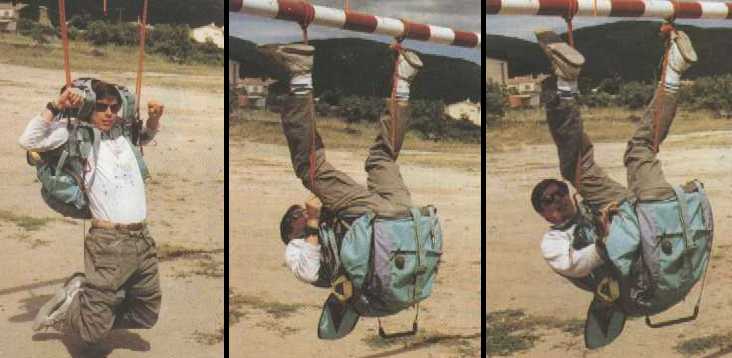
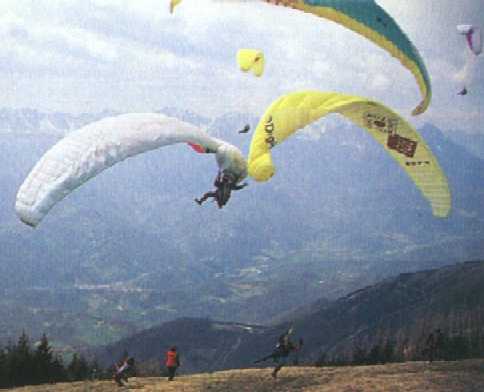
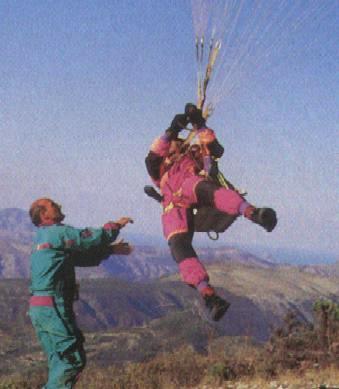
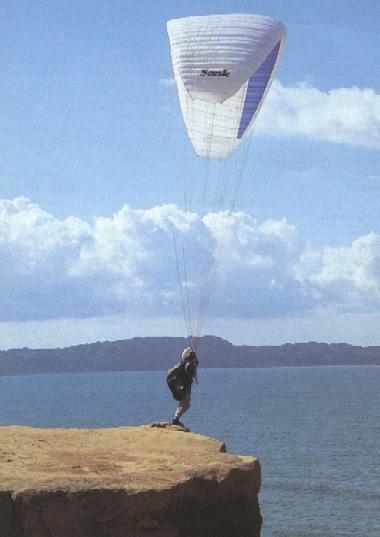
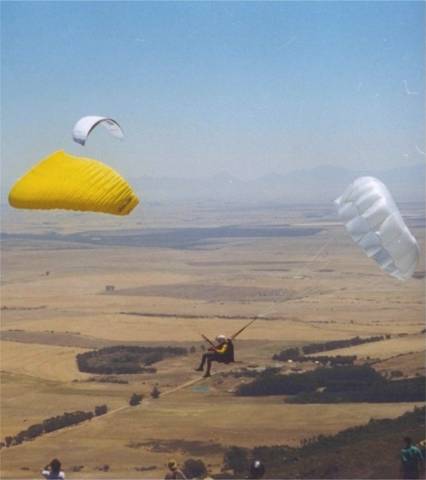
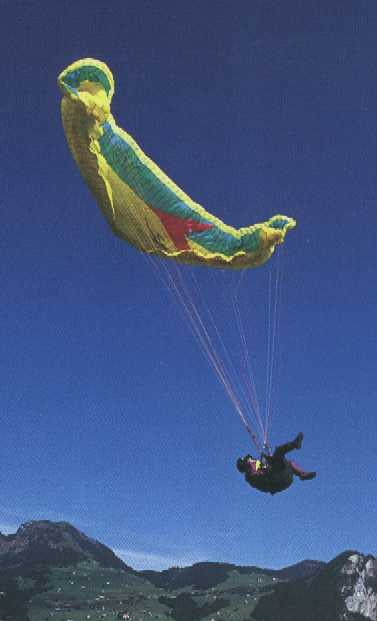
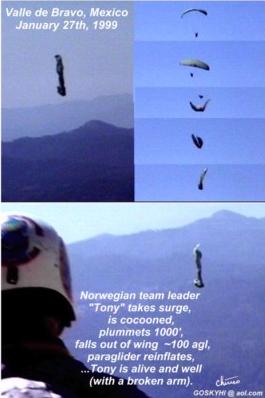
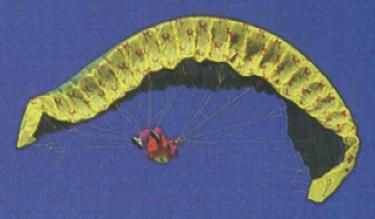
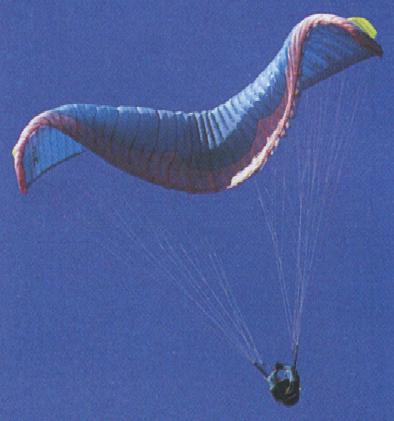
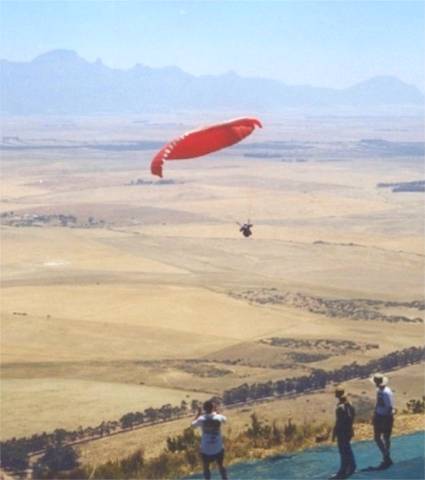
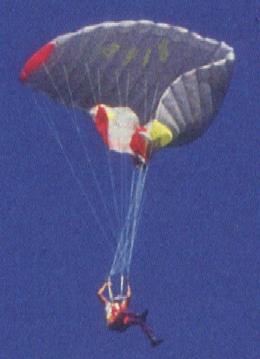
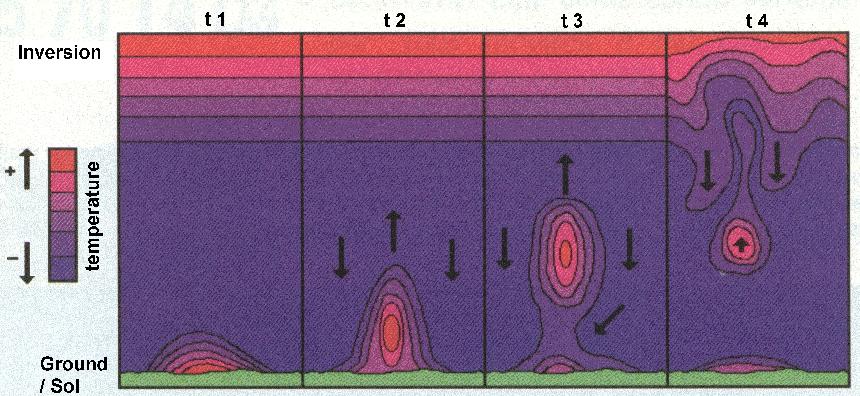
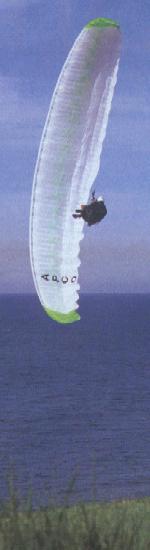
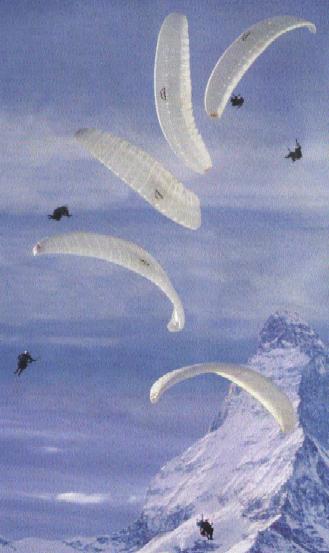
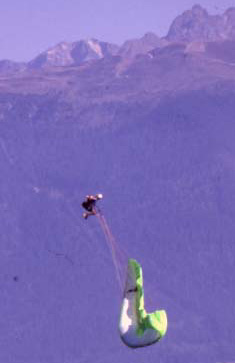
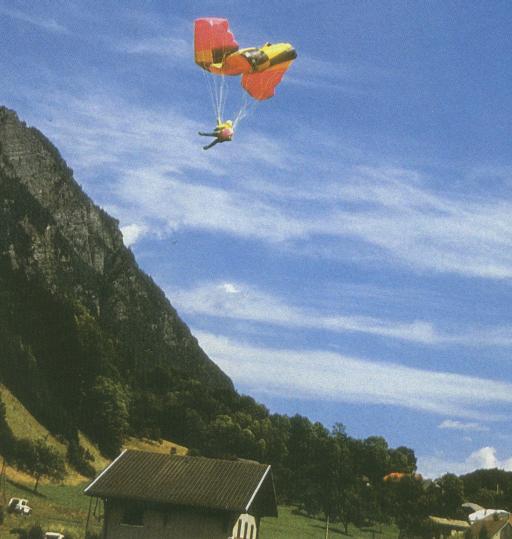
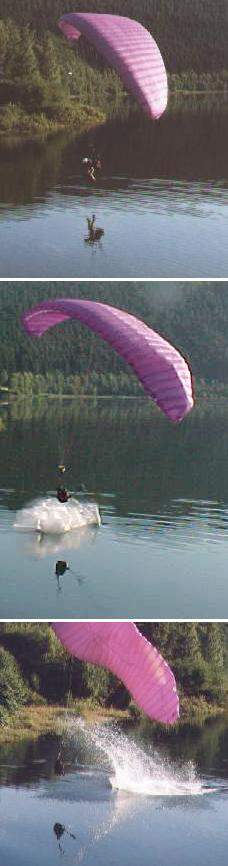
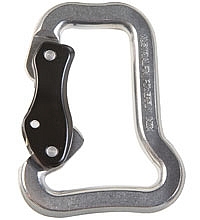
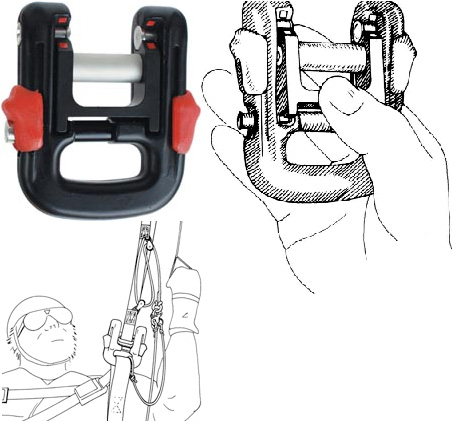
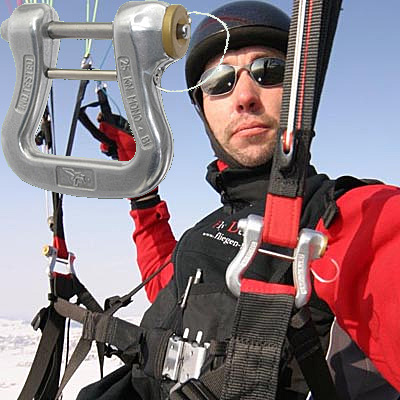
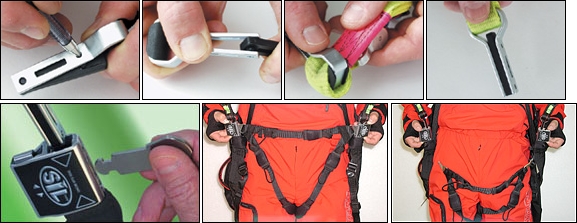
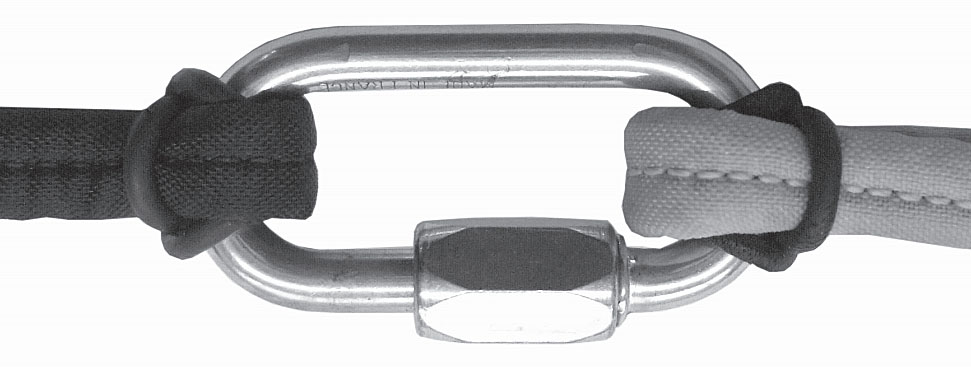
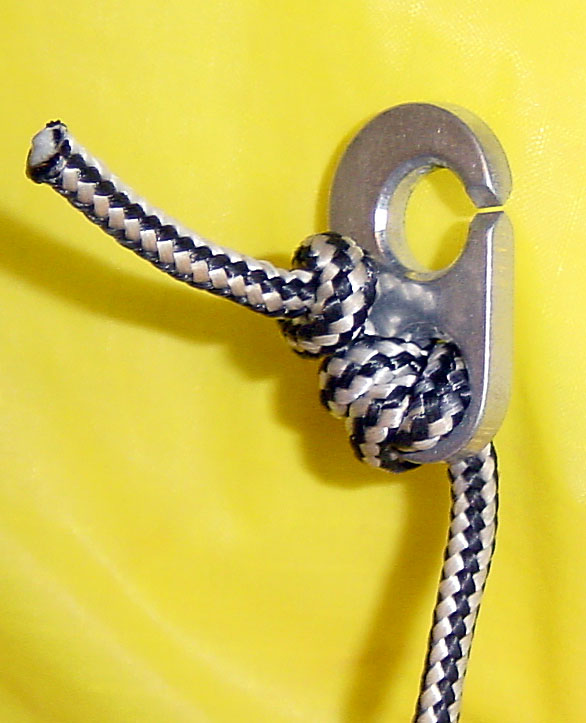
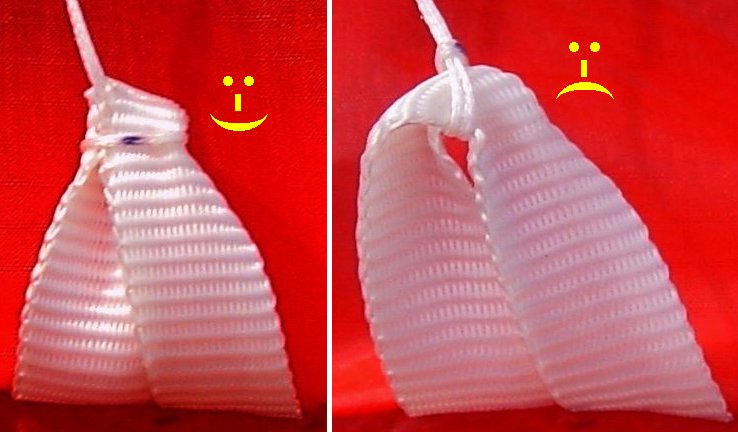